
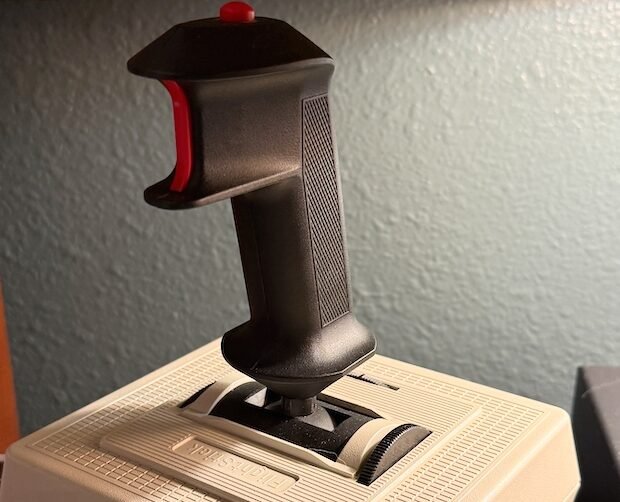
Look, I love the thrift store. They have things that can be turned into other things, and for not very much money.
The concept here is simple – Flight Sticks / other old input devices with buttons and knobs are really just a collection of buttons and potentiometers. These are just about the easiest components to use with a microcontroller (Arduino, Raspberry Pi Pico, etc.). All we really need to do is:
- Figure out which wires go to which buttons / potentiometers
- Solder those to the appropriate pins on a microcontroller
- Mount said microcontroller in the case somehow
- Tell the computer (AI) what you are using, how it is hooked up, and make it write the firmware for you
Choosing a controller
Older is usually better / easier. Bigger wires that are easier to follow, etc. But even modern ones are fine – you might just have a PCB to rip out and toss out.
Beware of the old arcade-style-looking joysticks. Those often just have 4 buttons – up, down, left, right – rather than potentiometers. Unless that’s what you want, of course.
Also avoid anything with TOO many buttons. Often when there are more than 5-10 buttons, there ends up being circuitry involved (button matrix) instead of a simple “2 wired for each button” setup like mine here.
Step By Step
1. Disassemble
Self-explanatory. Note some screws may be hiding under rubber pads.
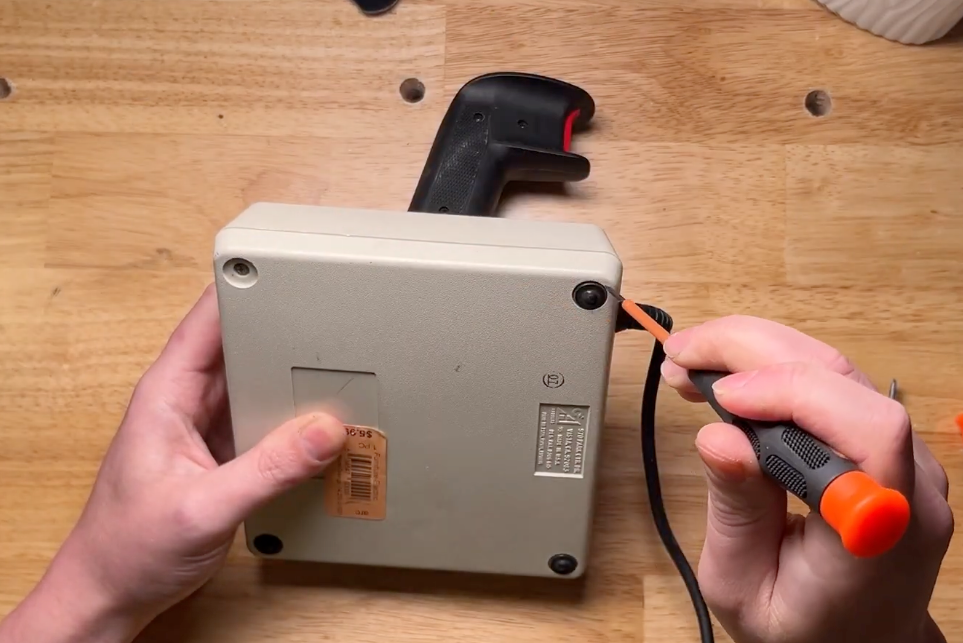
2.Figure Out Connections
Visually figure out which wires map to which button / potentiometer terminals and confirm with a multimeter. Take good notes.
3.Map Inputs to Your Microcontroller
You need a microcontroller that has enough ADC pins (Analog to Digital Converters). The Rasperry Pi Pico is $4 and has 3, which is what I used here. You will need one digital pin for each button.
See below for how I mapped mine to my Waveshare RP2040-Zero (Raspberry Pi Pico, but smaller footprint + USB C).
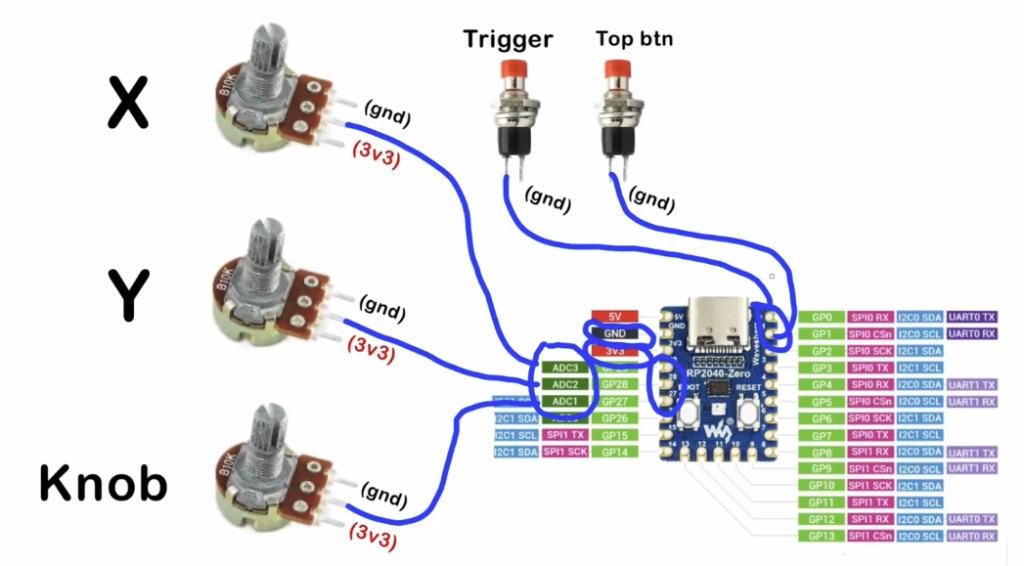
4. Mount the Microcontroller
Basically you need a hole for the USB cable to get through to the microcontroller input. In my case, I cut a USB-C sized hole in the case, 3D printed a little spacer, and hot glued everything in place.
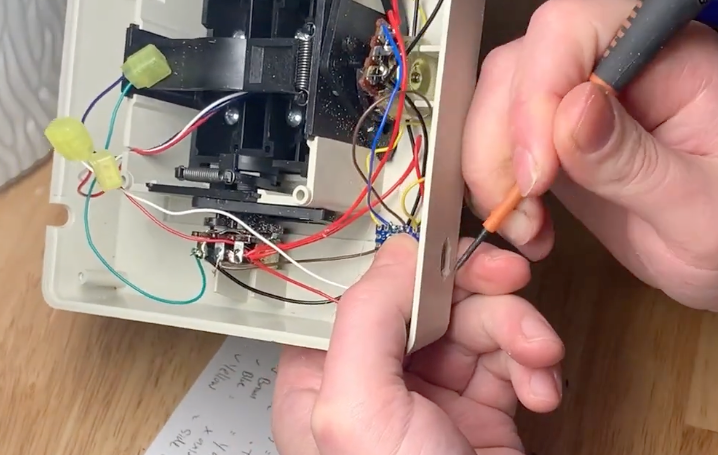
5. Re-Assemble
Use tape or a spot of hot glue to hold any wires in place where you want them. Then put it back together.
Note that in my case, I drilled 3 extra holes in the case and added 3 additional switches.
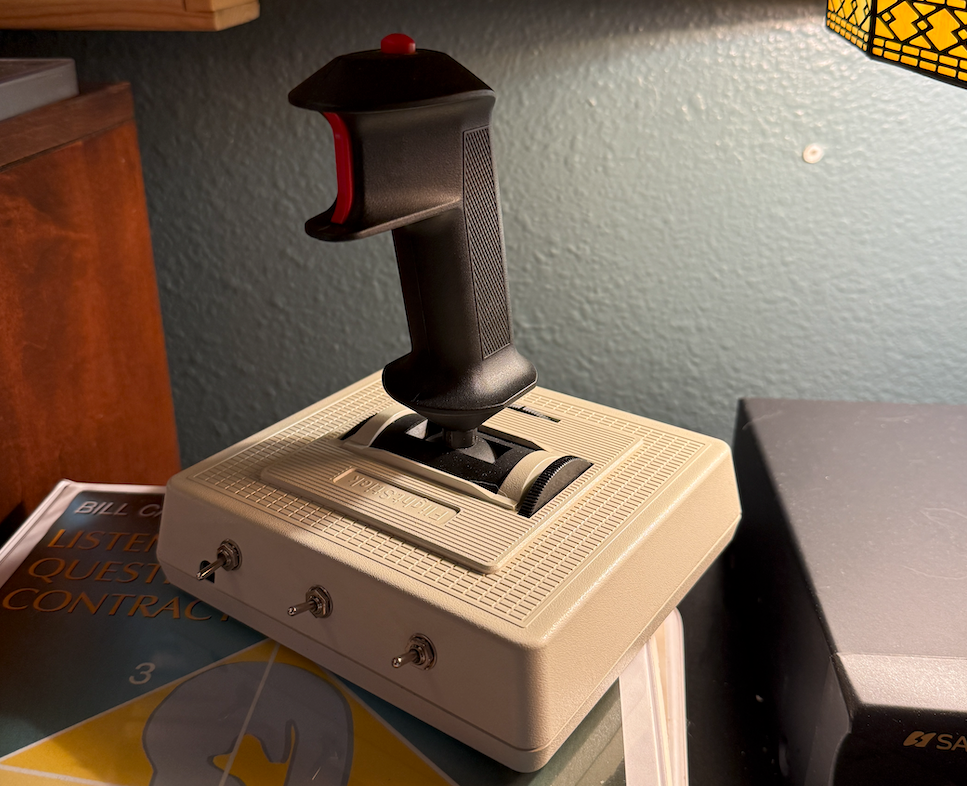
6. Software
Basically follow any guide for how to make a USB MIDI controller with your microcontroller of choice – plenty of great guides on the internet. I used a Raspberry Pi Pico and CircuitPython. Check out these links:
https://learn.adafruit.com/midi-for-makers/overview
https://learn.adafruit.com/midi-keyset/overview
https://learn.adafruit.com/prop-it-game/circuitpython
Alternatively, and this is probably my recommendation if you just want to get it up and running fast – describe your setup to any AI model, and tell it what you want it to do. Here is an example prompt for my specific setup:
I'm using a Raspberry Pi Pico connected to a joystick and some buttons. Write the firmware in CircuitPython for this project and then tell me how to install it and test.

There are 2 potentiometers for the 2 joystick axes. They are connected to GP28 and GP29. A third knob pot is connected to GP27. There are 2 buttons connected to GP0 and GP1 and GND.

I want each axis direction - up, down, left, right - to send separate CC messages. When the joystick is at center, nothing sends. At any extreme, it sends value 127. So 4 CCs that send values 0-127 depending on how far it's tilted in each respective direction. The buttons are momentary toggles - send 127 when pressed, and 0 when released.

Create a settings.json file where I can modify the CC mappings and settings easily.

Consider calibration / deadzone settings. Recommend how to handle this based on my setup. Also consider if and how we should smooth the output, since microcontroller ADCs can be a bit jumpy.

Before starting, ask me any additional questions you have.
Conclusion
There are tons of old input devices available out there. This is a cheap and beginner-friendly DIY MIDI project, and the result is something useful that you can’t just buy. Also, reusing old soon-to-be garbage is always a plus.