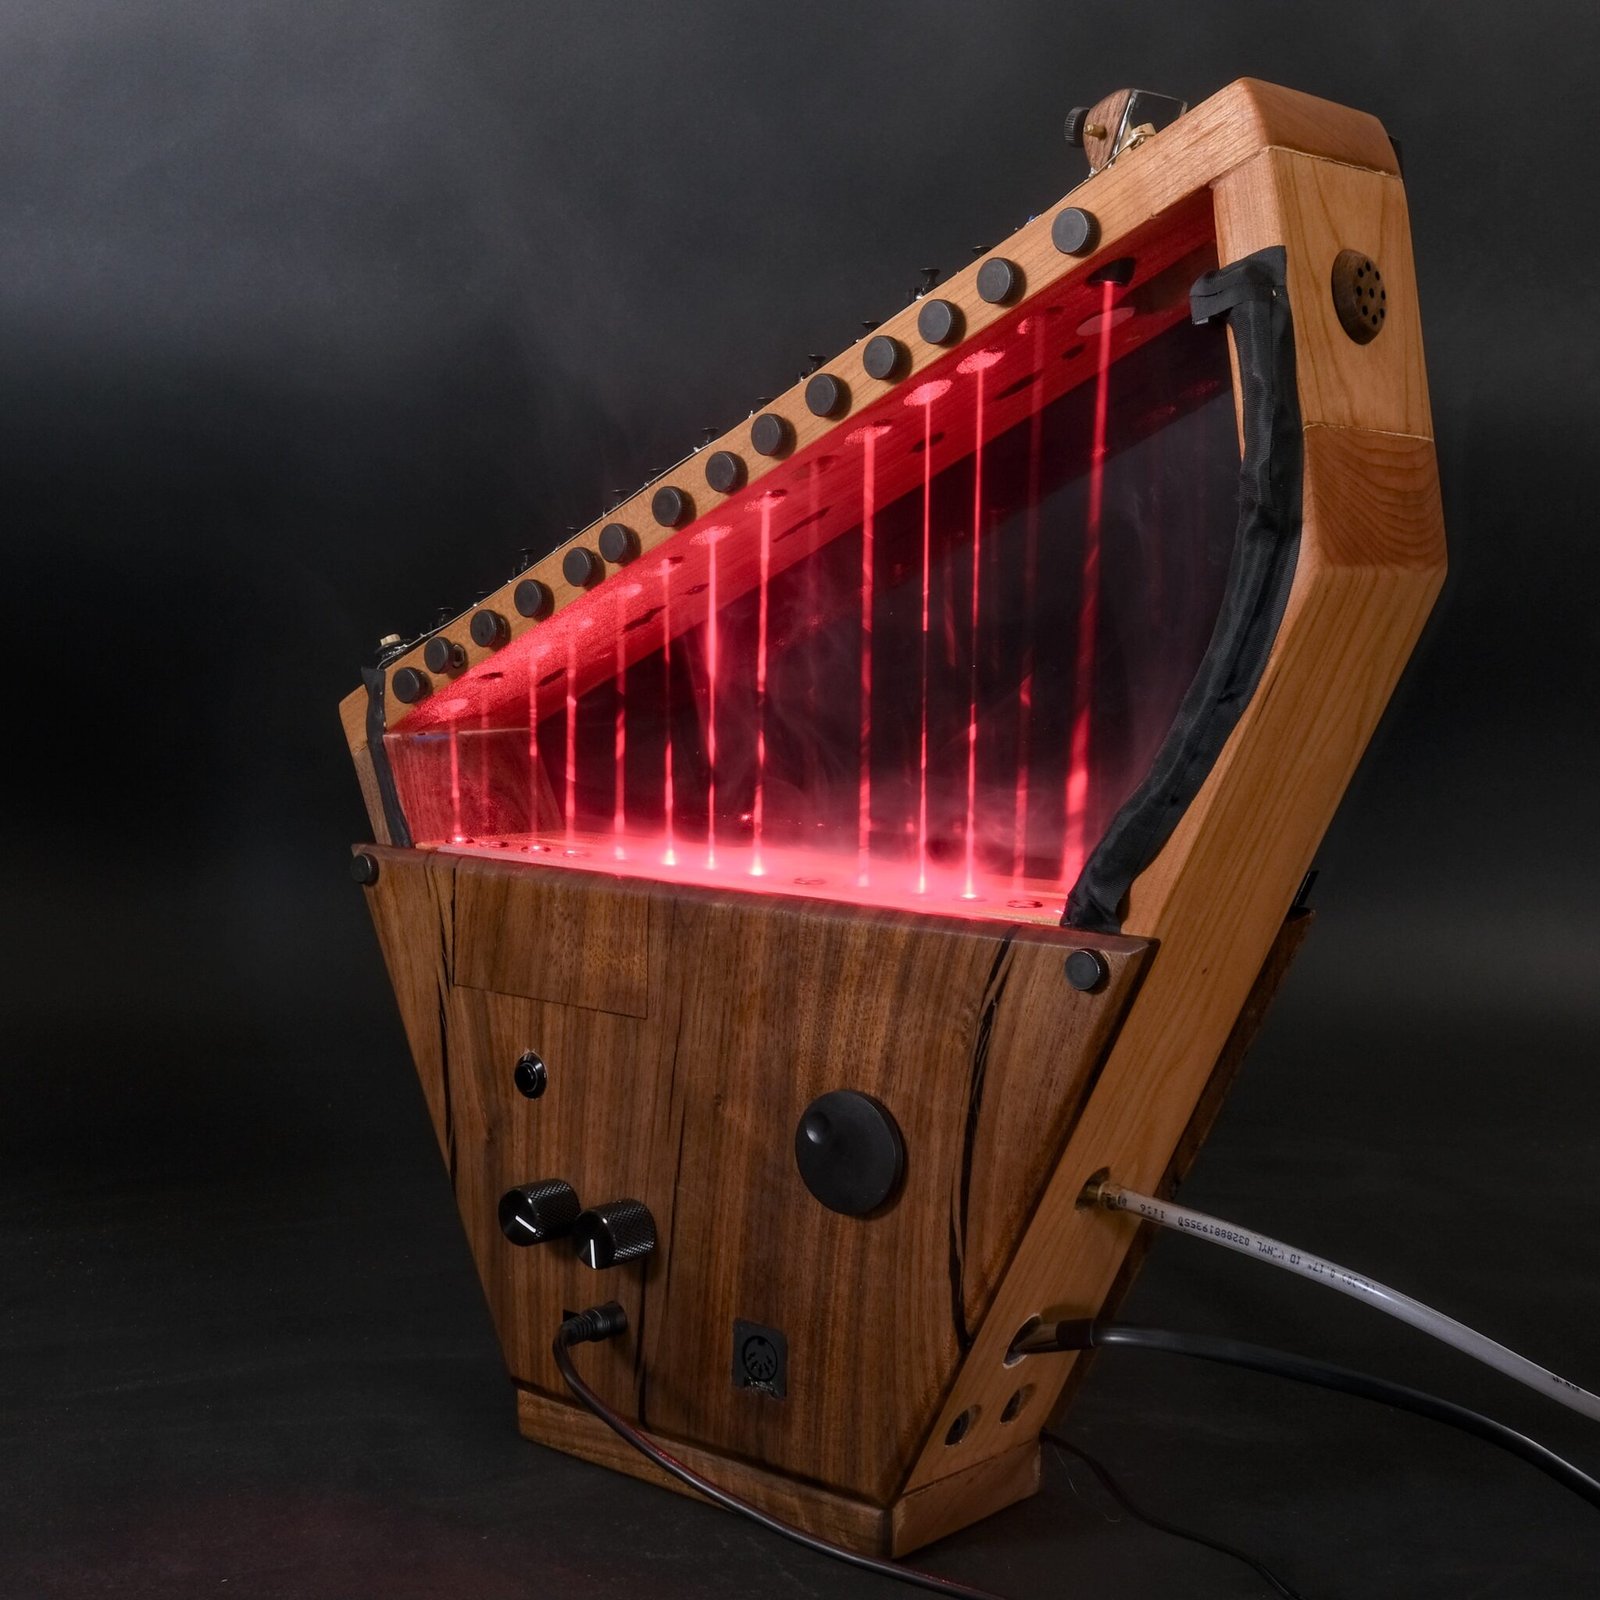
It started at Meow Wolf in Santa Fe. My wife played with a laser music installation and said ‘I want one.’ I figured I could build one if I tried hard enough. Ten years later (with some long breaks), here it is.
Below is a short video demo of the harp in action.
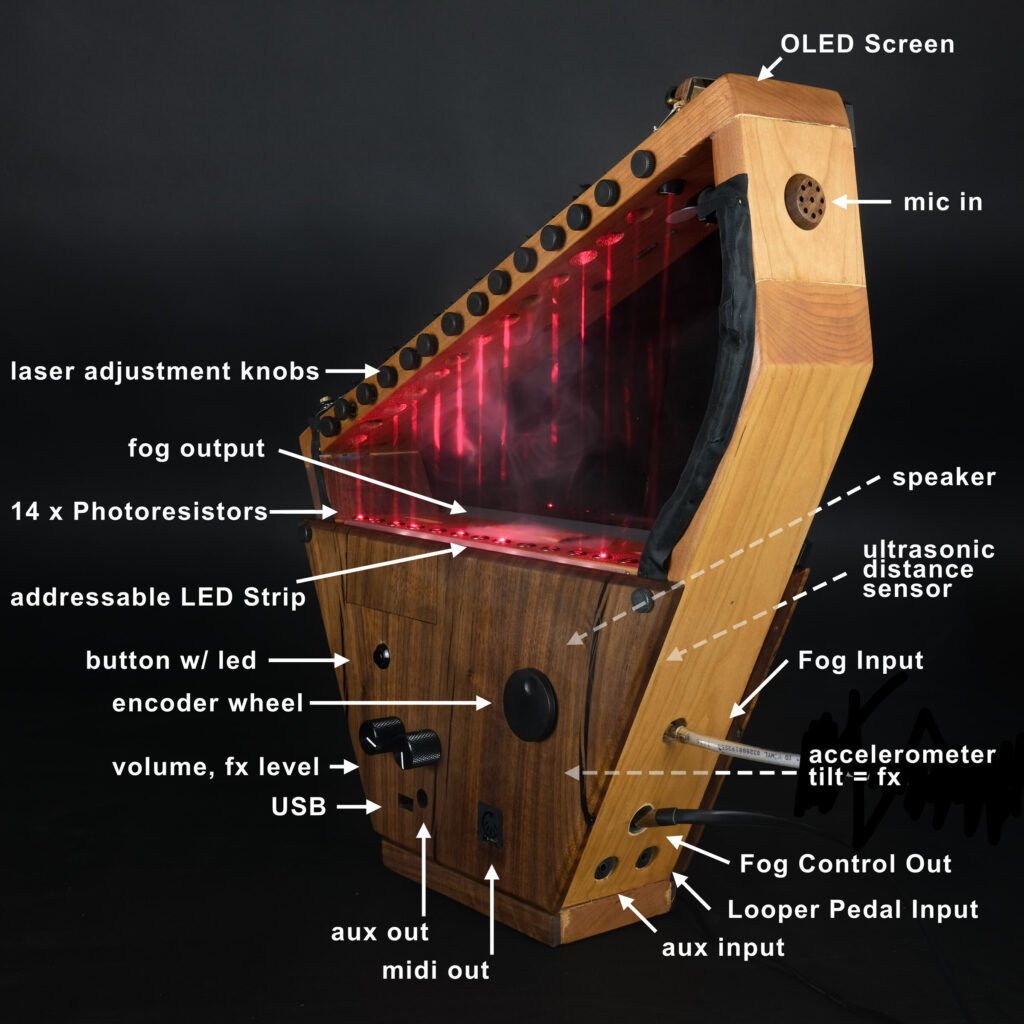
Here is an at a glance diagram of the features and hardware.
How it Works
I’ll create a much more detailed post eventually, but in a nutshell it works like this:
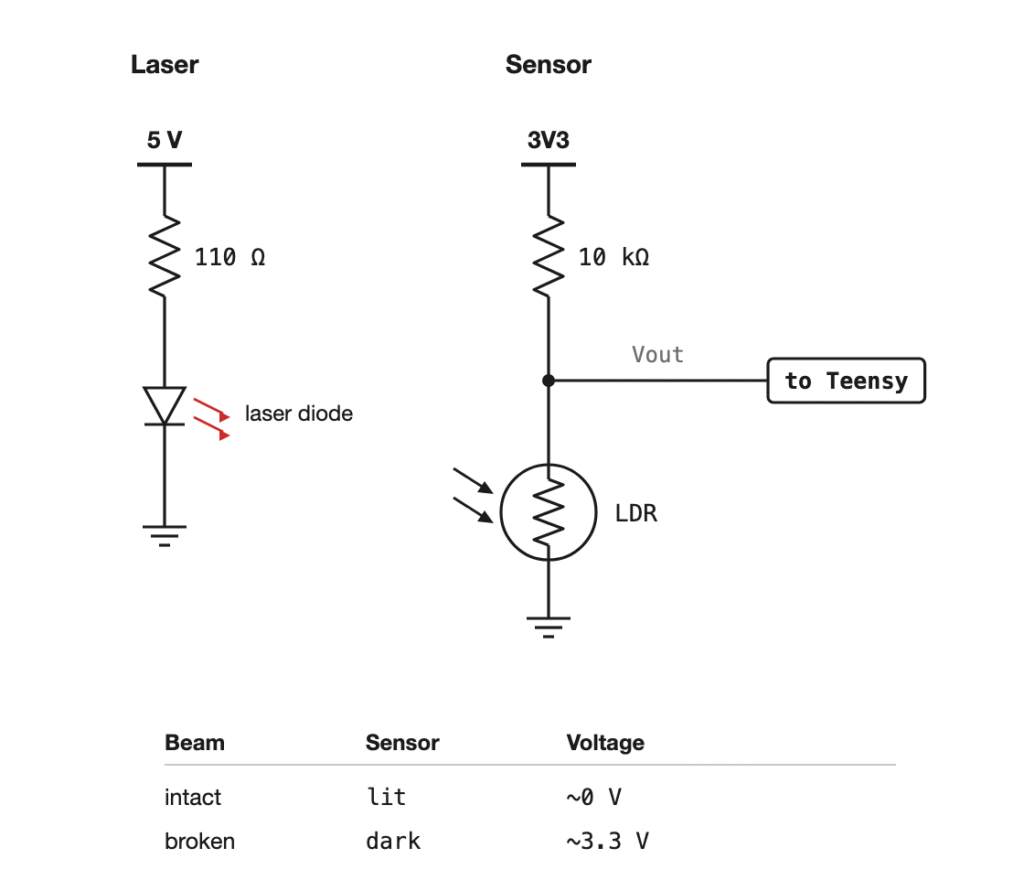
- Lasers are pointed down at LDRs (Light Dependent Resistors) which change an output voltage output based on the amount of light hitting the sensor (via a voltage divider). In my setup more light = lower voltage.
- Breaking a beam reduces the amount of light hitting the sensors, increasing the voltage – past a threshold the software flags the beam as “broken”.
- Un-breaking a beam causes the voltage to swing back. Once it passes the threshold again, the software flags the beam as “un-broken” and plays the note.
- Since the LDRs output an analog voltage, The software times how long the beam takes to go from broken to restored. A quick flick is loud and a slow pass is soft, mapped to a MIDI velocity of 1–127.
Version 1 (2019)
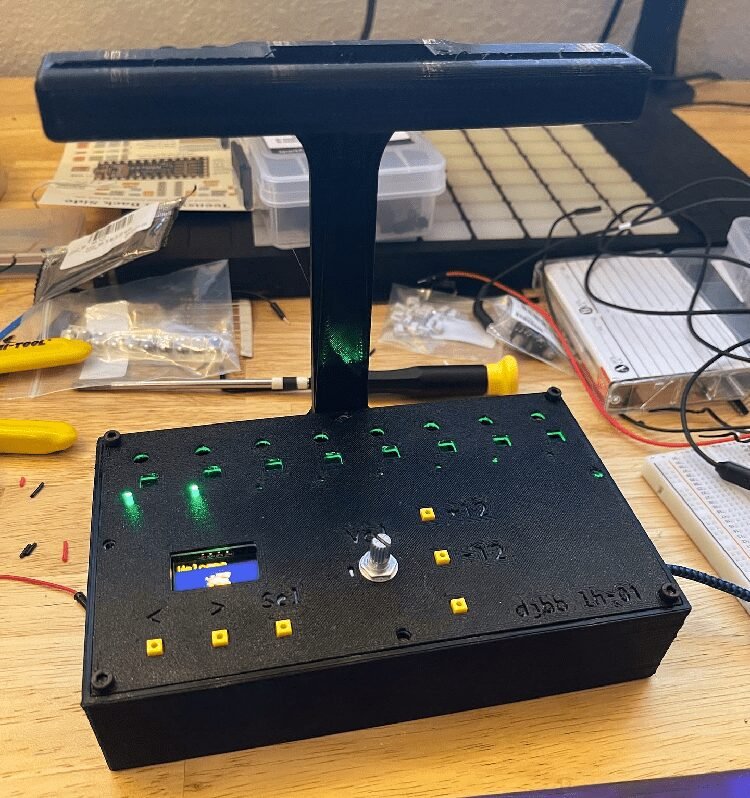
The first version was much smaller, and everything was 3D printed. This was my very first time using a Teensy, and maybe the 3rd (and most complicated) microcontroller project I completed. Not much else to add here other than here it is
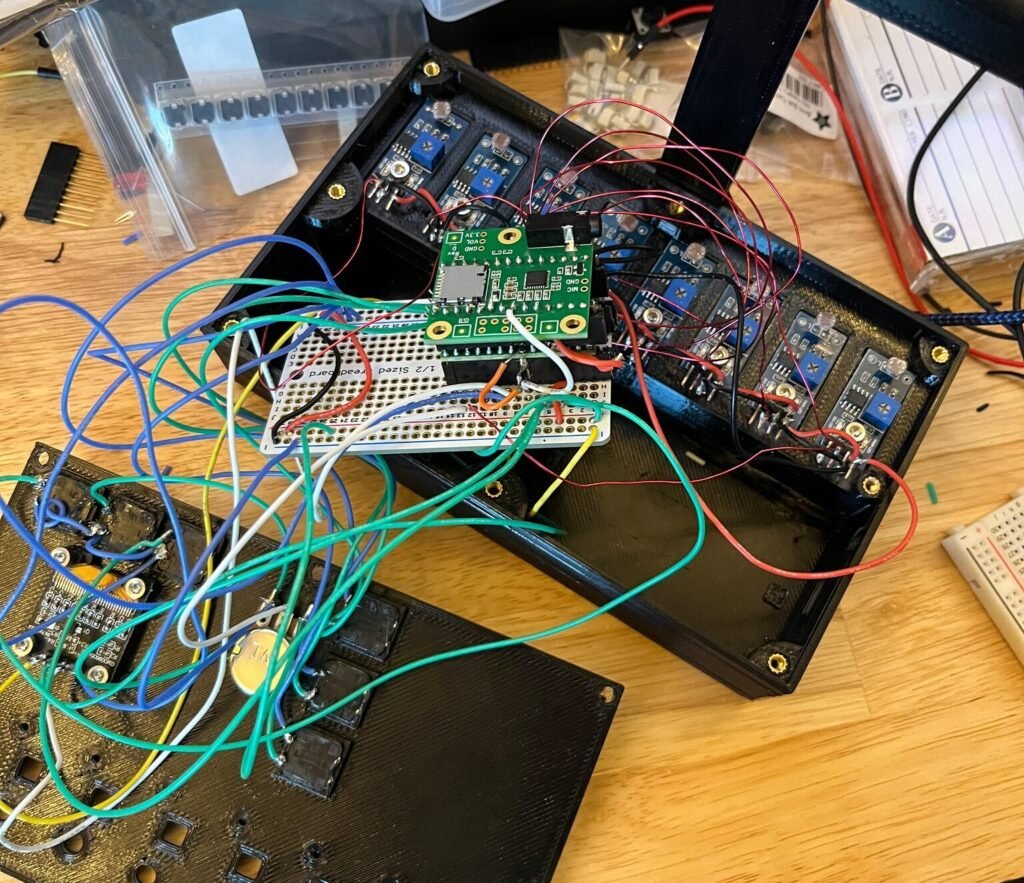
Version 2 (2023-26)
In 2023 we bought a house in Fort Collins and lucky for me there is an excellent creator hub in town that I promptly got a membership to. After getting trained up on the wood shop tools, I wanted to make a better, more playable version of the harp.
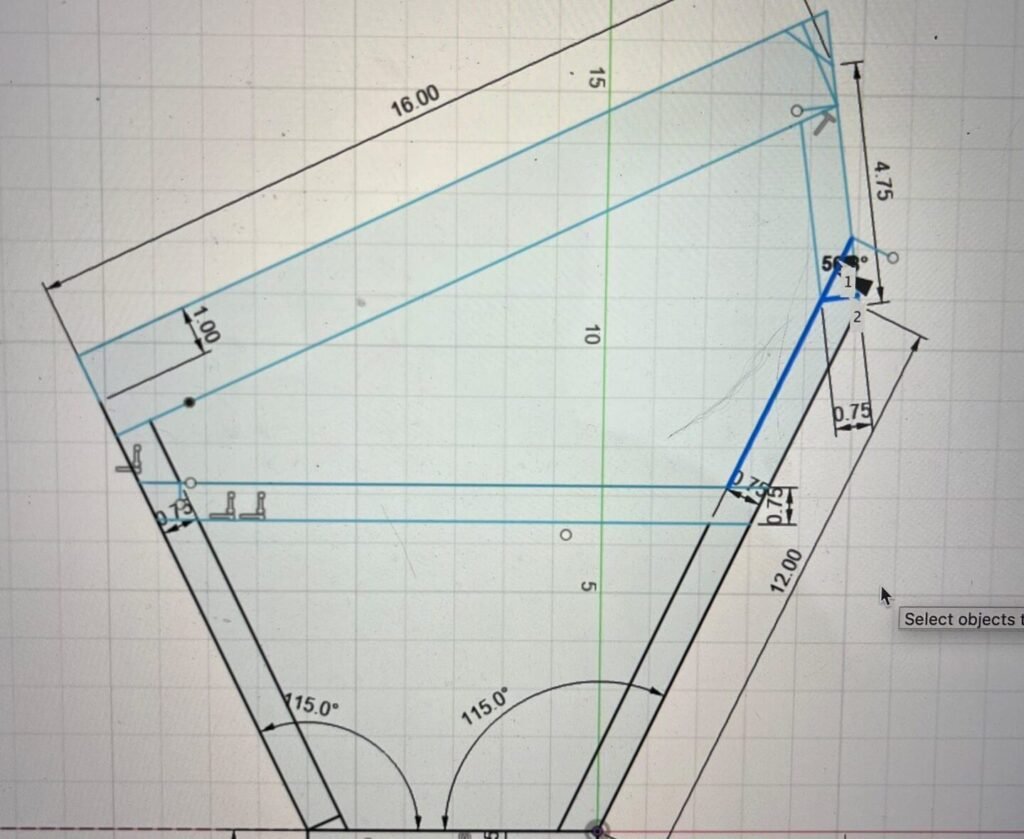
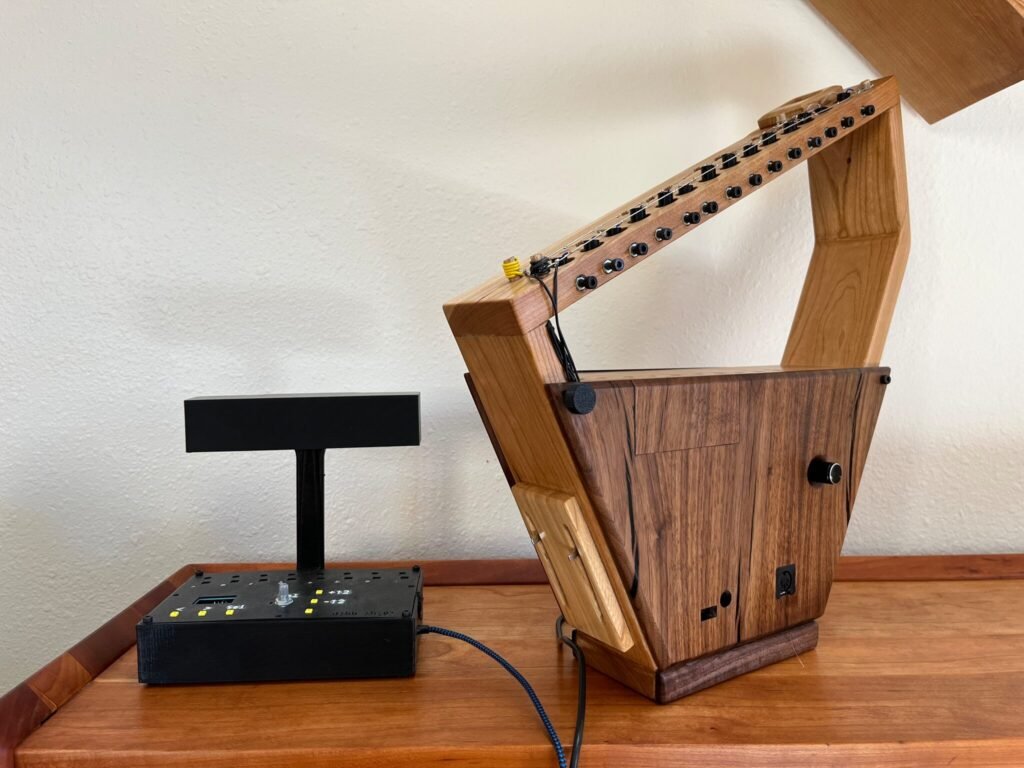
I first came up with the overall shape using a sketch in Fusion 360. I used the angles and lengths as a guide in the wood shop, though the final dimensions I adjusted a bit while assembling. Partially by accident.
Woodworking
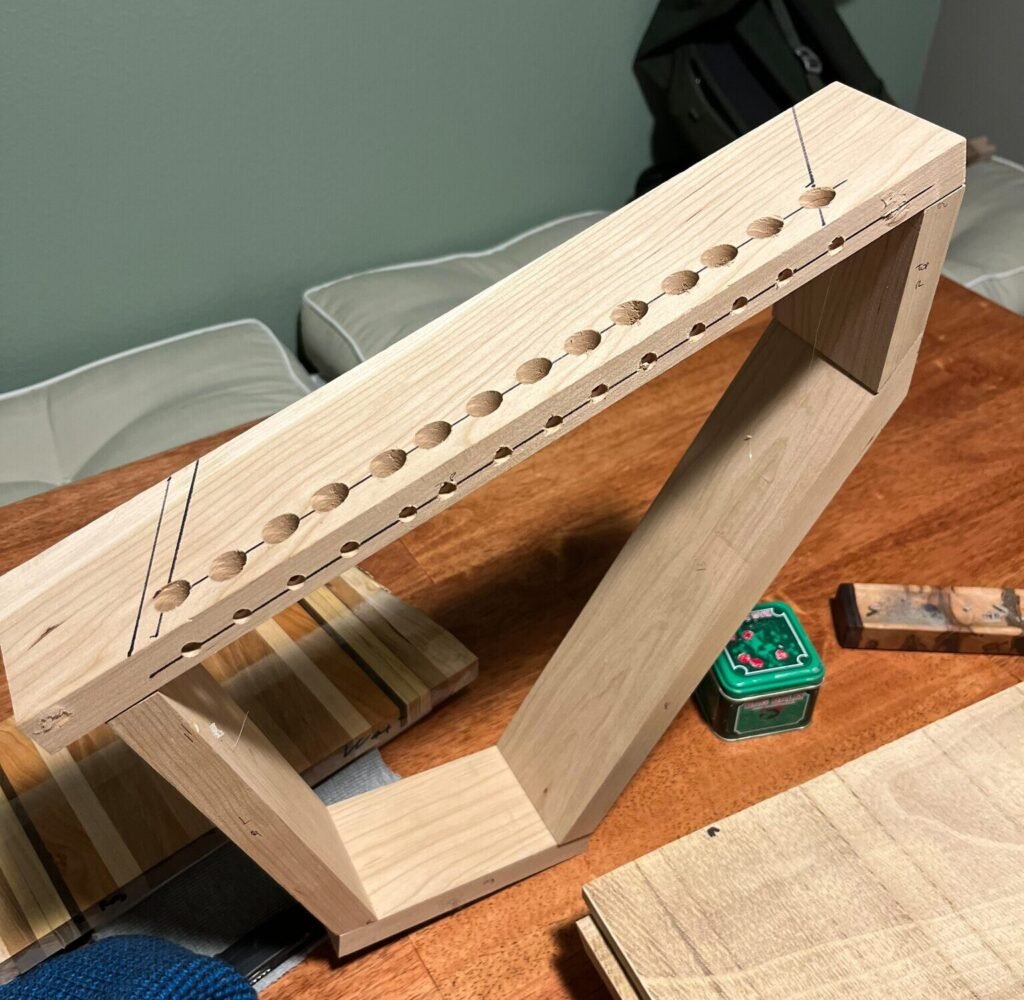
I had some scrap 3/4″ walnut and cherry lying around so I used the cherry for the frame, and the walnut for the side panels. The miters were not perfect and I had some gaps to fill, but it worked out well enough.
Cutting the angled holes for the lasers was a bit of a pain. It involved making a jig to hold it at the right angle under the drill press. But this is also why I designed in adjustable lasers… as long as it’s close enough to the right angle they can be aimed just fine.
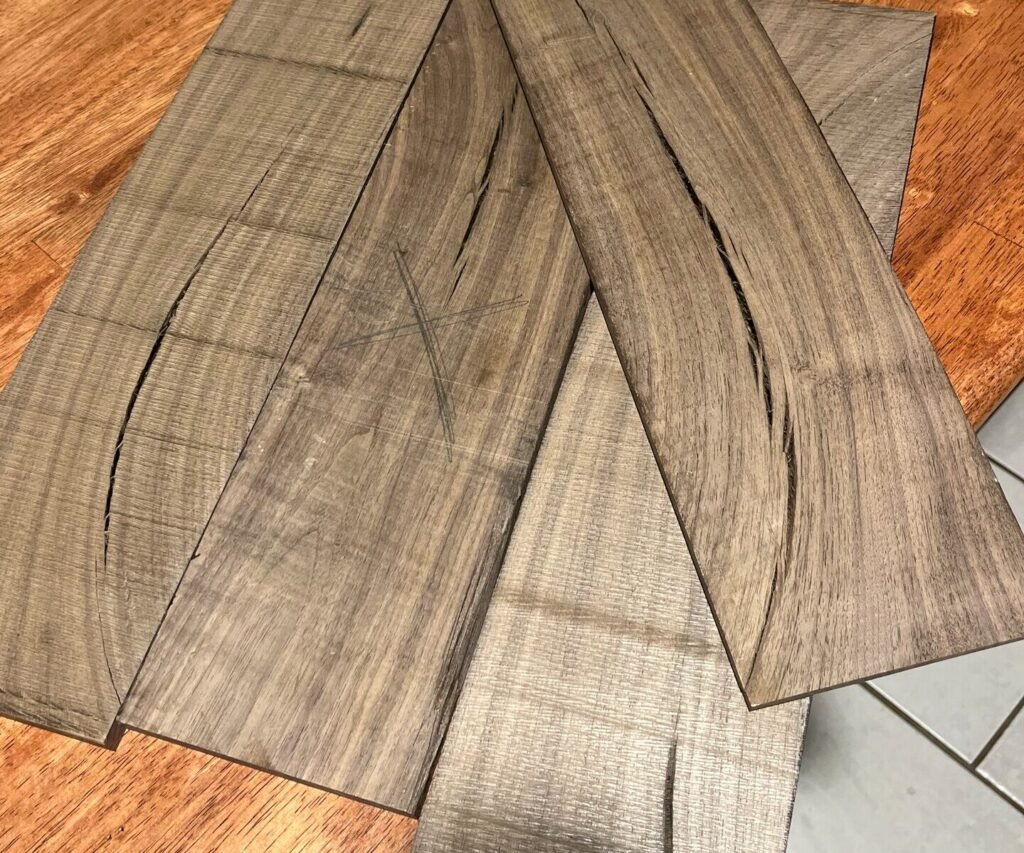
For the side panels I needed thinner wood – I used the shop bandsaw to resaw a 3/4″ piece of walnut roughly in half. Trying to use jigs or the fence ended up being too frustrating, and since it’s not my bandsaw I’m not at the liberty of messing around with adjustments and tuning the machine, so I just drew a center line and eyeballed it by hand. Close enough.
The cracks were filled in with black epoxy and planed flat to about 1/3″.
For the speaker holes in the right panel, I 3D printed a stencil, then just hand-drilled them all. Note the LDR above the speaker hole jig here… that was later replaced with the distance sensor for finer control (more on that later).
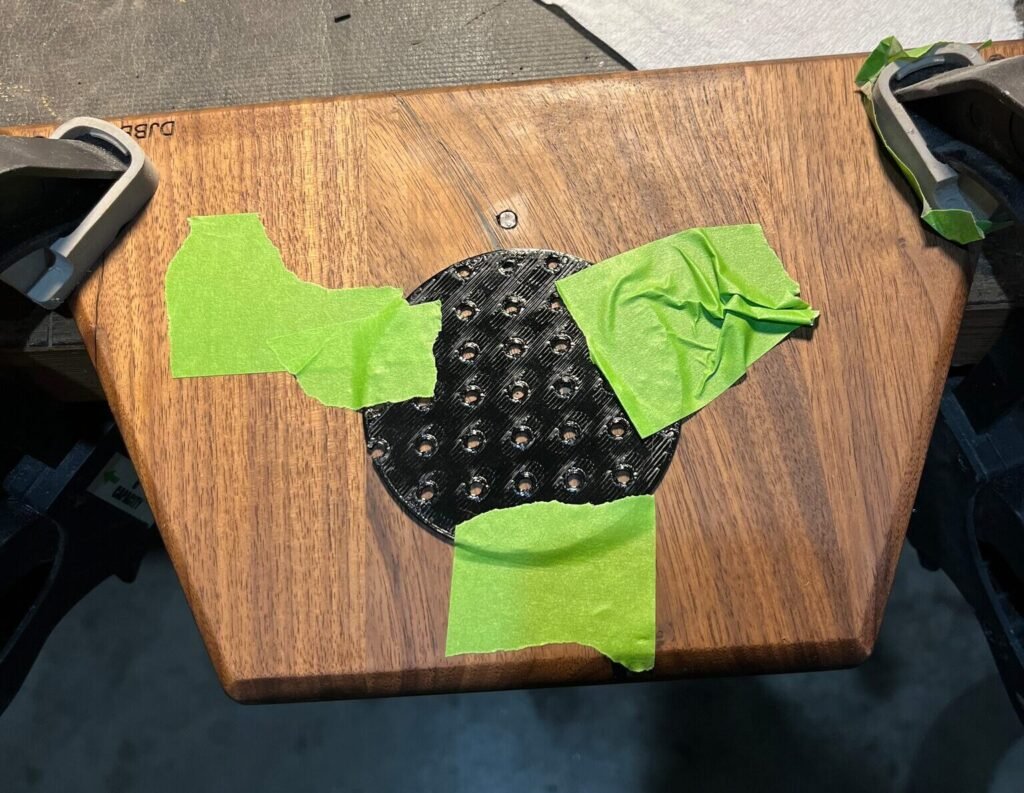
I ended up sanding the walnut panels to some stupid-high grit for max shine – just felt more fine-instrument? Im talking 1500 or something.
I used a hardwax oil finish (Rubio Monocoat) – because I have it, and it’s impossible to mess up. No idea if it made a difference, but I did a 2nd coat a few days after the first – again going for max shine factor.
Lasers, Sensors, Mux board, Screen
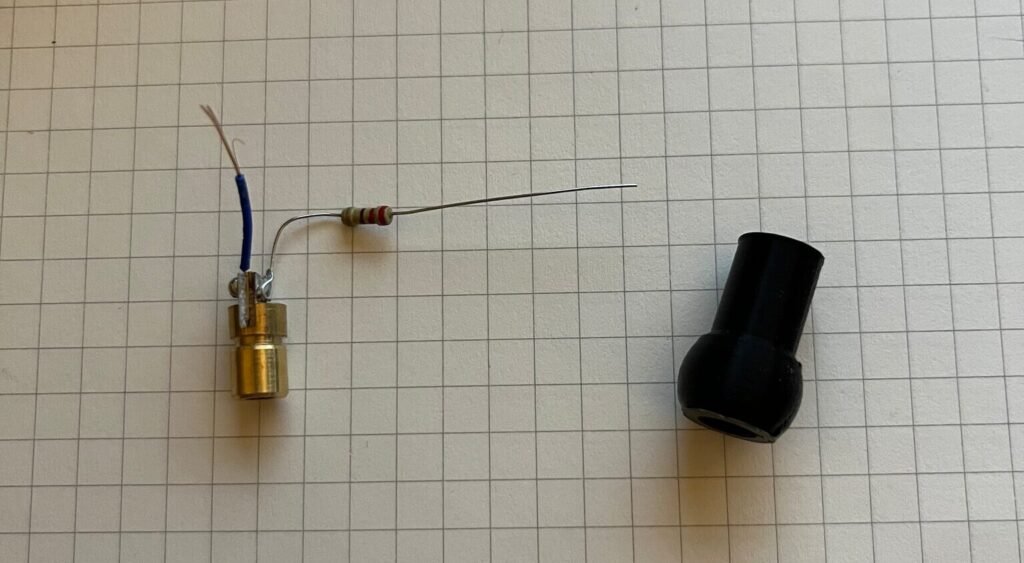
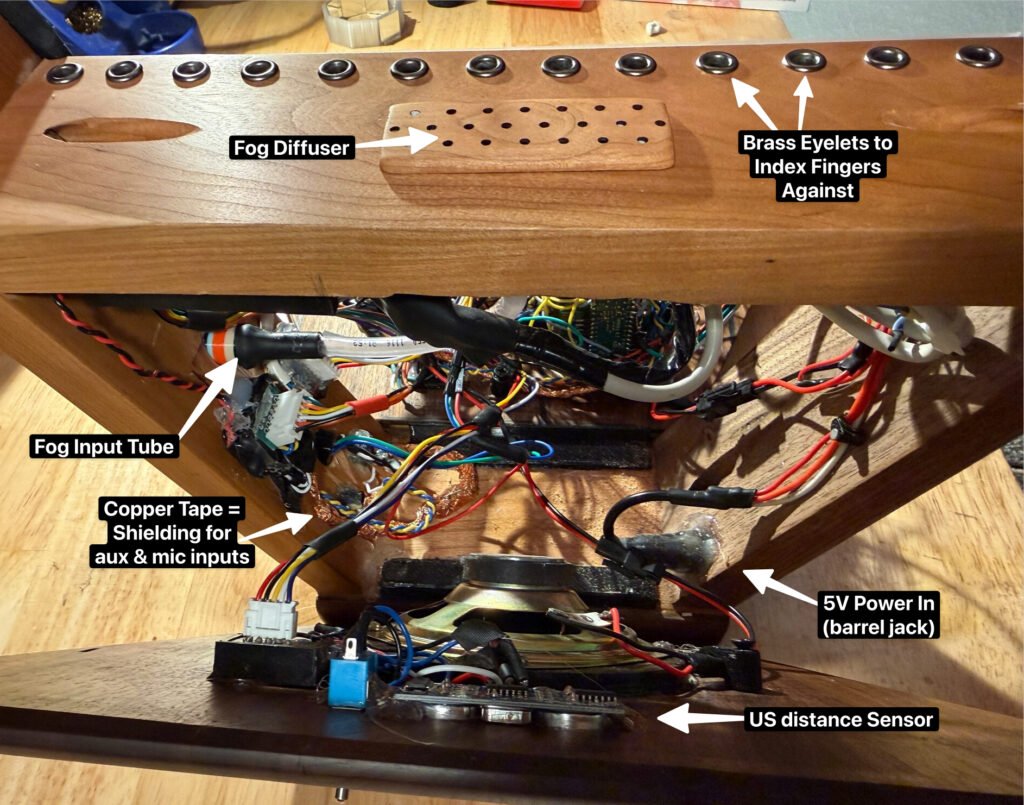
The lasers are powered directly from the 5V power supply, through 110 Ohm resistors. They are inserted into PETG plastic housings with a sphere shape at the end – this is what makes them adjustable. M3 thumb screws tighten against the ball, holding it in the current position.
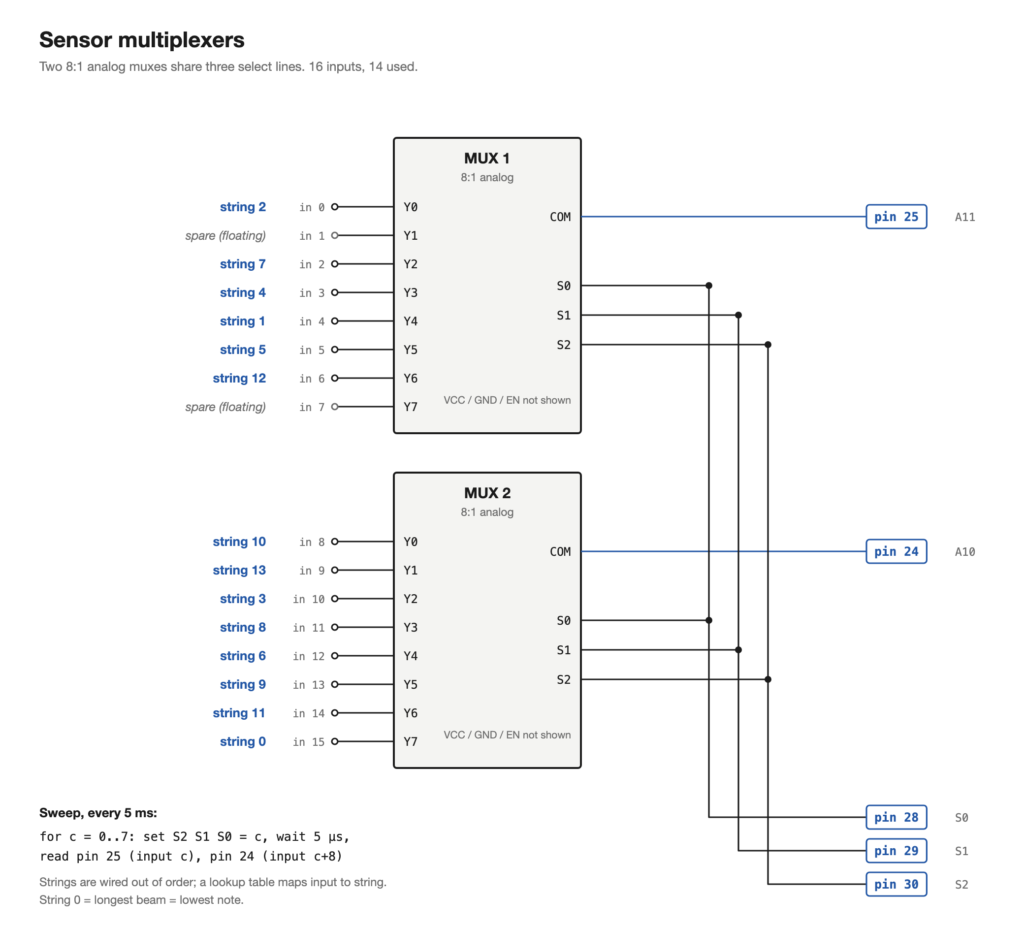
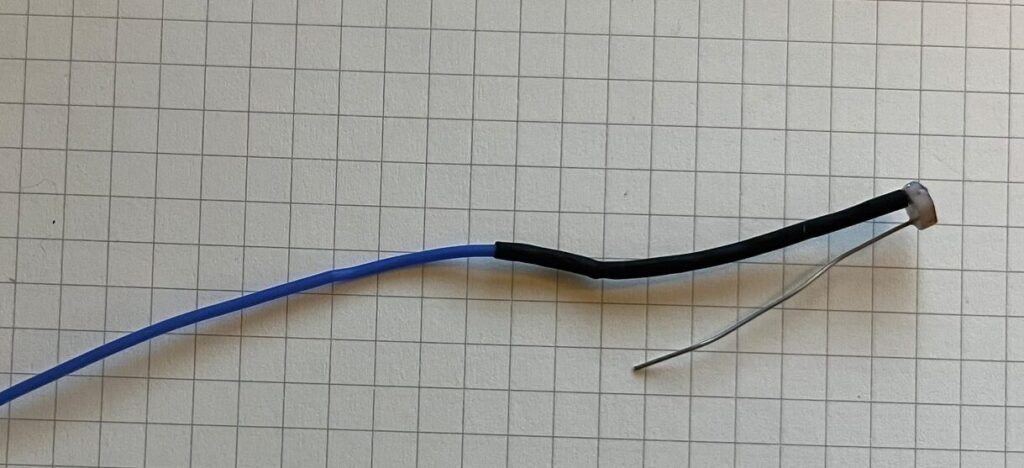
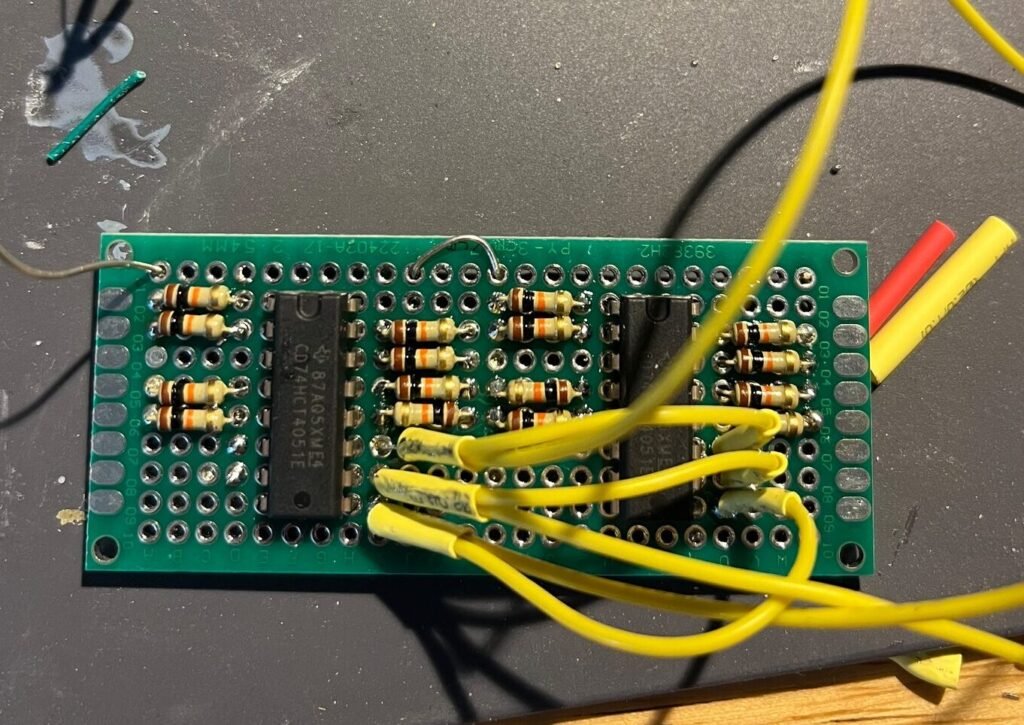
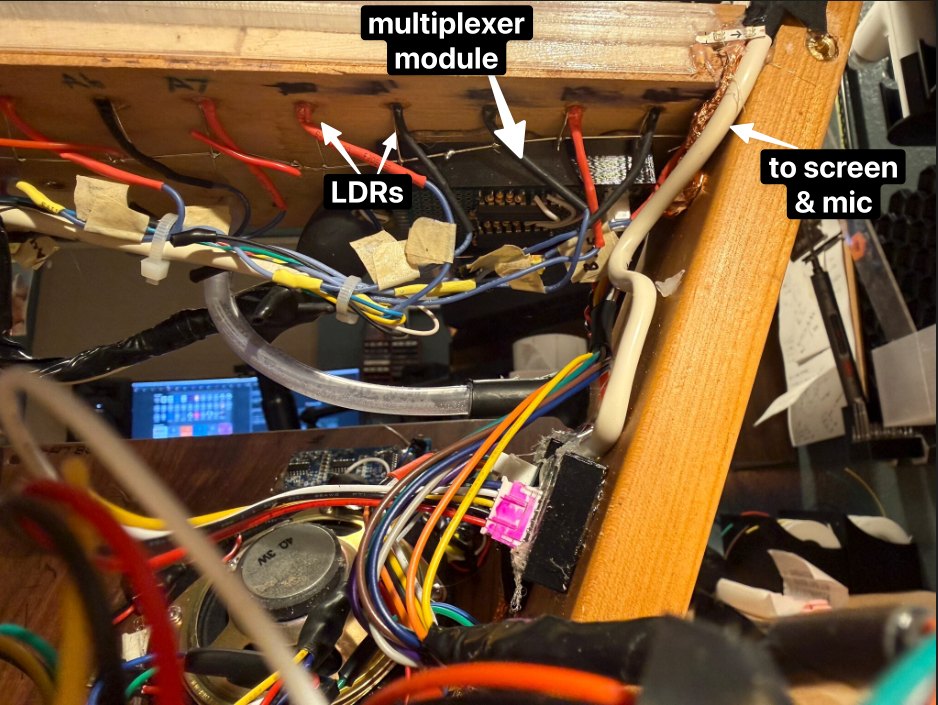
The photoresistors connect to the teensy through the multiplexer module, which consists of 2 x 74HC4051 analog multiplexers. This gives us 16 analog inputs while only using 2 analog pins on the Teensy – enough to cover the 14 strings. Since I used raw LDRs rather than modules, a voltage divider has to be added for each sensor.
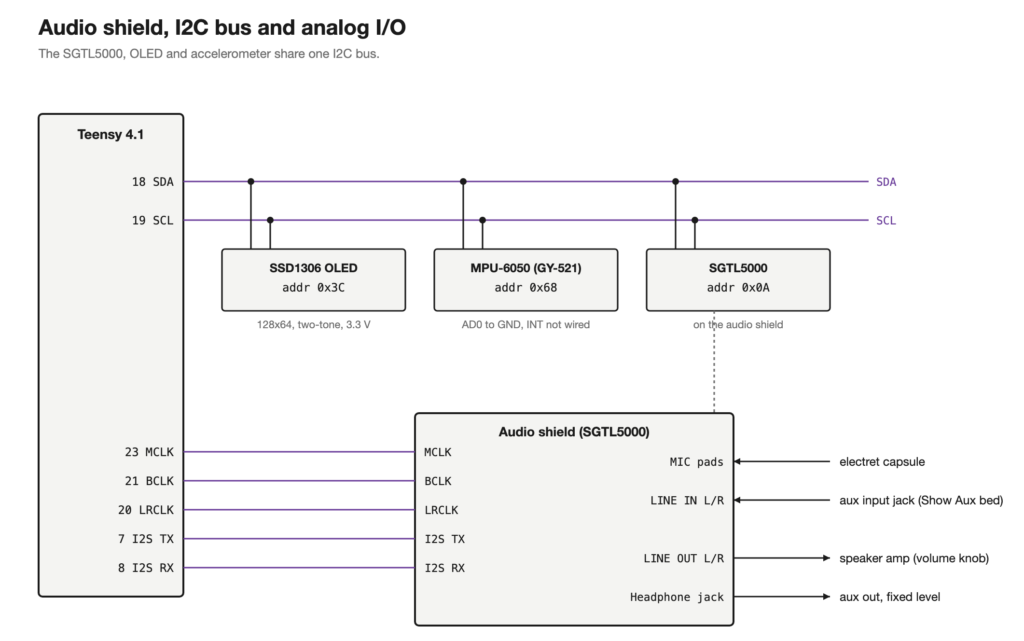
The screen is just a cheap 128 x 64px OLED from AliExpress which is viewed through a mirror setup. This wasn’t the plan, but I mounted it before thinking about how it would actually be played, and this corrects for it. I kinda like the added complication. Unfortunately the only pic I have of it is very bad.
Sound Engine & Effects
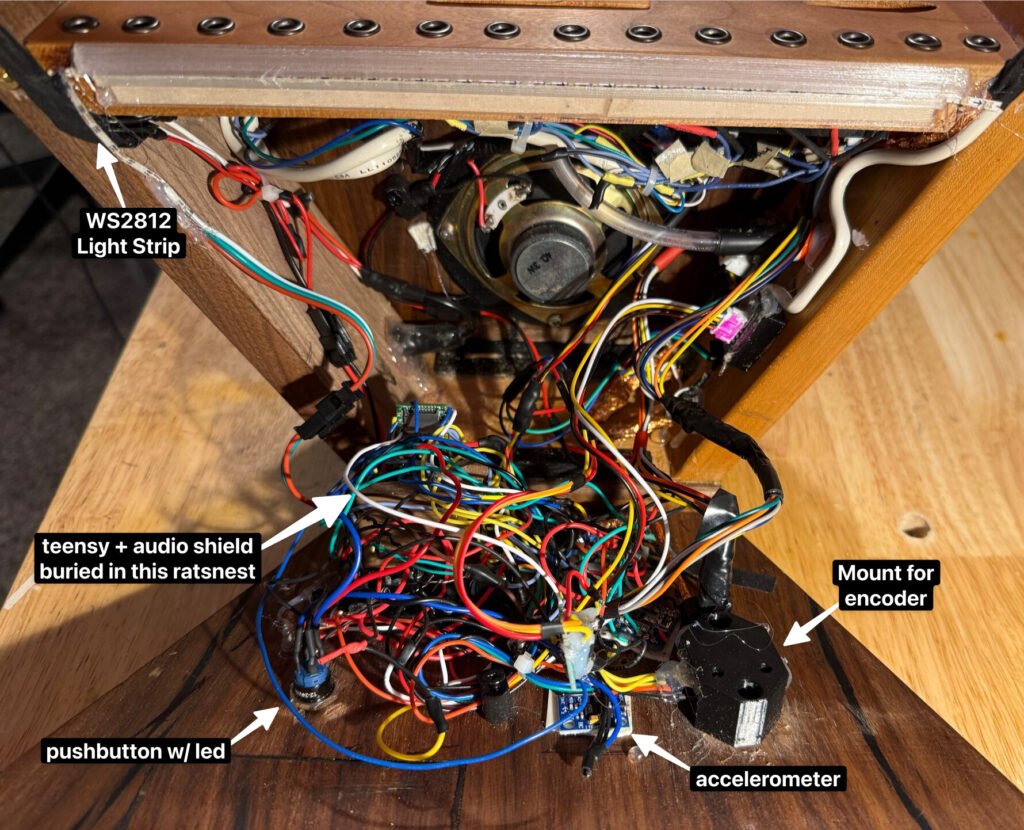
All audio and effects are based on the excellent Teensy Audio Library. Karplus-Strong string synthesis is used for the string sounds. For some reason I’ve always loved the sound of this algorithm. There are other presets for pads which use simple subtractive synthesis. Eventually it will have more.
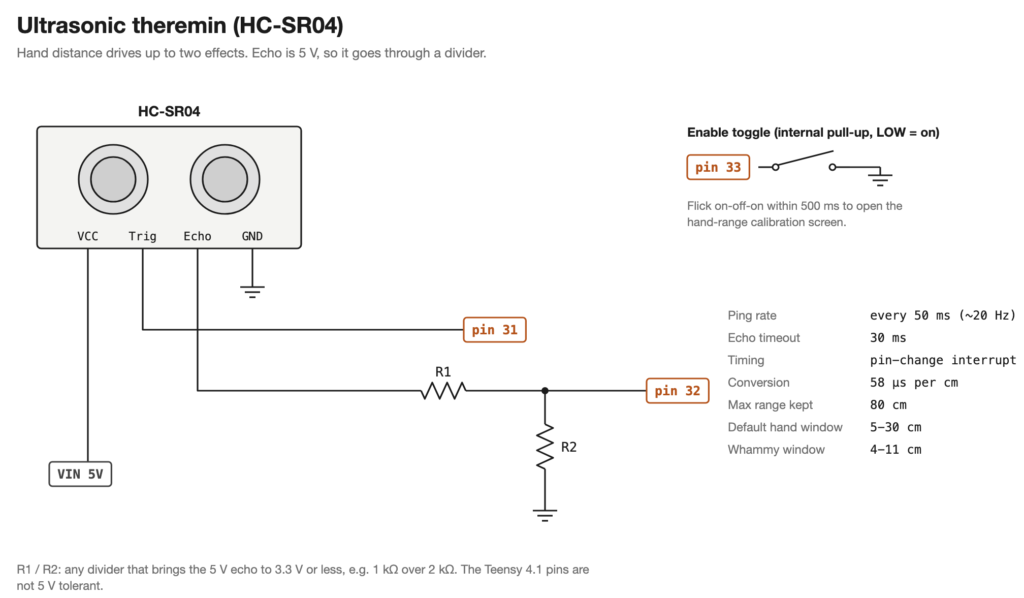
There are 2 ways to add effects to the laser harp performance – tilting the whole harp in any direction, or using the right hand in front of the distance sensor in a theremin-style way. This makes a total of 5 effects that can be controlled live while playing. I haven’t settled on which effects to use for what, but have been playing with freeze / granulation effects, reverbs, delay sends, bit crushers, and pretty much whatever else is easy to add via the Teensy audio library.
The Auto Fogger
There is an optional fog machine that fires for 2 seconds, then ignores the strings for 5 seconds so it doesn’t run nonstop.
I got this mini fogger made for props & costumes since a full sized fog machine is overkill. There is a port on the back of the harp for the fog supply tube.
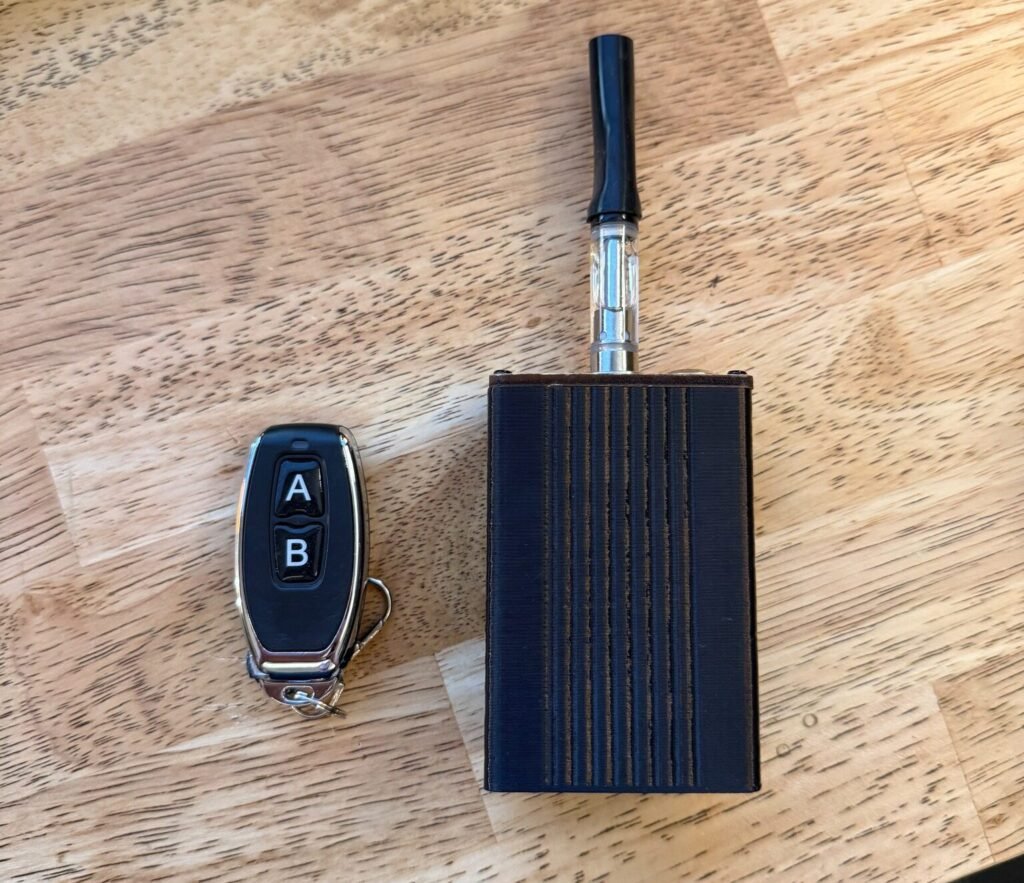
The mini fogger is controlled with a little IR remote. In order to control it automatically via the Teensy, I took the remote apart and added an aux jack. A standard 3.5mm aux cable connects to the back of the harp. I only needed 3 wires – On button, Off button, Common – so a stereo aux cable first the bill.
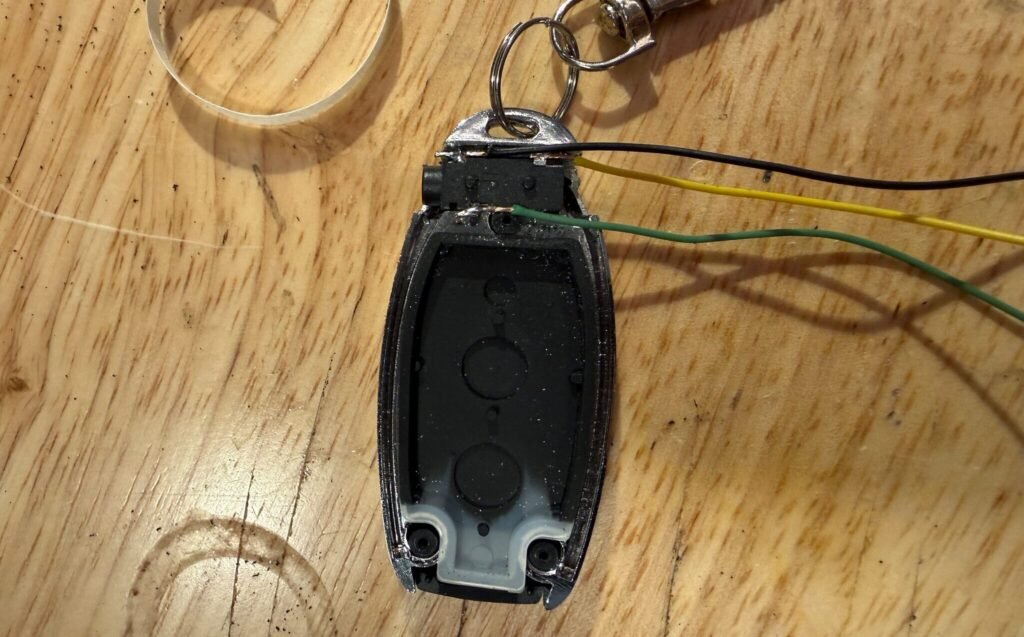
Inside the harp is a little optocoupler module that I made, which allows the buttons on the remote to be “pressed” remotely. I needed 2 because the on and off buttons on the remote are separate buttons. The optocoupler was required because the remote buttons weren’t simple “short to GND” style buttons.
Internals – Assembled
Dropping the entire thing on the floor and having it explode gave me the chance to get smarter about modularization. When I re-assembled, I designed it so that both side panels can be completely removed, mostly via JST connectors.
The annotated photos below show how everything is mounted.
Lessons
I learned quite a few things during both versions of the build.
Cable Management – As bad as this might look now, it was much worse. Especially when trying to fit so much into a compact space – plan ahead with how things are routed.
Use More Connectors (and color code them) – Before I added connectors it was a nightmare to get to components on the inside. But make sure to index them in some way… I fried a screen by not doing this. Now they are color coded. Modularity is good.
Make Laser Positioning Adjustable – Even with 3D printed parts, it was almost impossible to aim the lasers perfectly. Part of the is the cheap laser diodes. Having a way to aim them after mounting was essential. It also makes them much easier to replace when they burn out.
Use Multiplexers – They are simple to use, cheap, and basically give you unlimited analog inputs on a Teensy. They also help with modularization and cable management – instead of 14 wires routing from the LDRs to the main board, I only have 5 (3 x select lines, 2 x analog outputs).
Shield analog audio inputs – I thought I didn’t need it, but after routing the wires parallel to each-other for cleanliness, the screen interfered with the mic input. I ended up just wrapping coper tape and grounding at the mic end, which works just fine.
Closing & Future Ideas
Hope this inspires someone to make a thing of their own.
Here are some things to implement next:
- Better utilize the PSRAM chip I added to the Teensy. For example, create a sampling mode where you can sample from the mic / aux onto individual strings and play back
- Get the vocoder working. It kinda works but does not sound good.
- Replace the US distance sensor with a laser distance sensor – more resolution since it’s not based on the speed of sound.
- Fog dispersion – figure out how to use a small fan or something to evenly disperse the fog inside the harp without just shooting it out.
- More presets / sound engines. FM synthesis, more interesting subtractive patches, etc.
Links
Adafruit and SparkFun have good beginner guides on various components used in this project. Here are a few related ones.
- Adafruit: Photocells
- SparkFun: Voltage Dividers
- SparkFun: Multiplexer Breakout Hookup Guide
- Adafruit: Ultrasonic Sonar Distance Sensors
- Adafruit: MPU6050 Accelerometer and Gyro
- Adafruit: Rotary Encoder
- Adafruit: Monochrome OLED Breakouts
- Adafruit: NeoPixel Uberguide
- PJRC: Audio Tutorial Workshop
- SparkFun: MIDI Tutorial
- SparkFun: Logic Levels
Appendix
More details in case they are useful for someone.
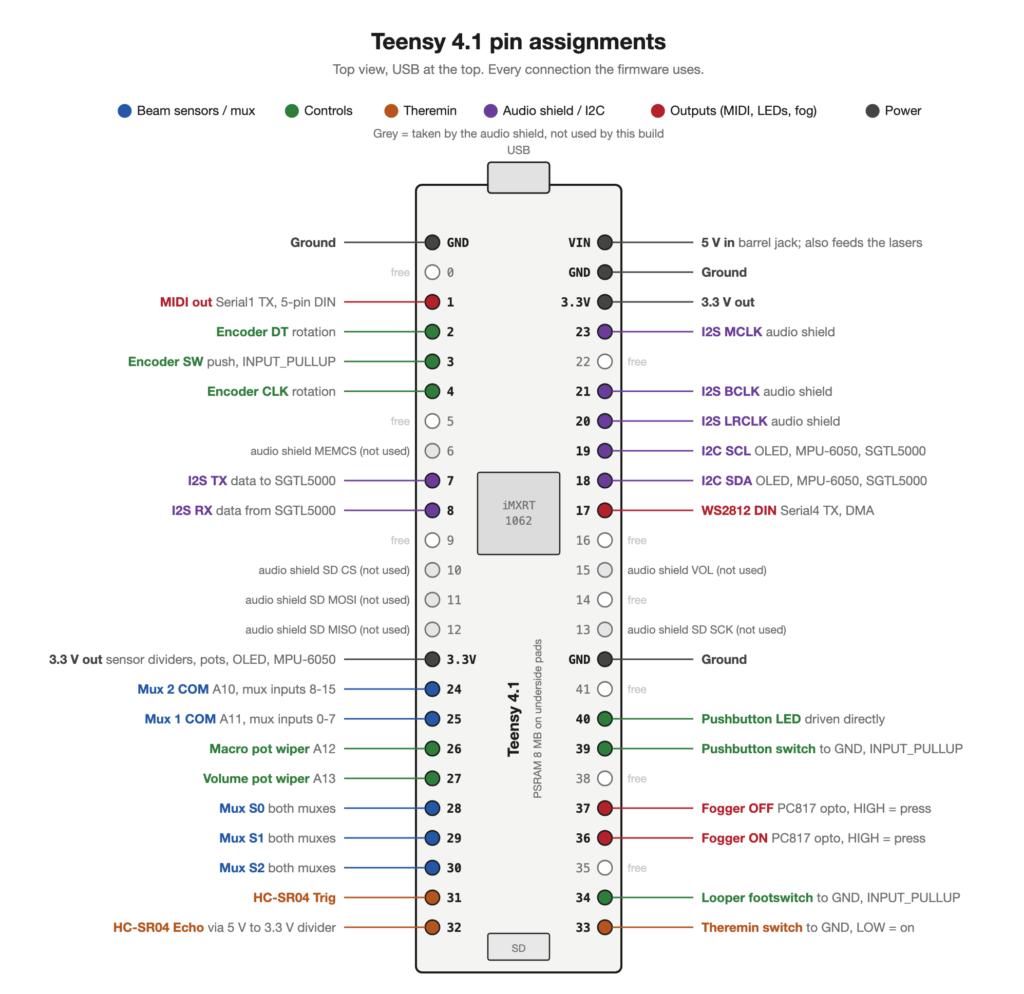
A1. Teensy Pinout
A2. LDR Voltage Divider
A3. I2C Setup
A4. Hand Distance Sensor
A5. Multiplexer Wiring