
The first version of the loopster can be found here. Changes from V1:
- SMD Components – can get it partially assembled at the factory
- RP2040 chip built into board – no more raspberry pi pico needed
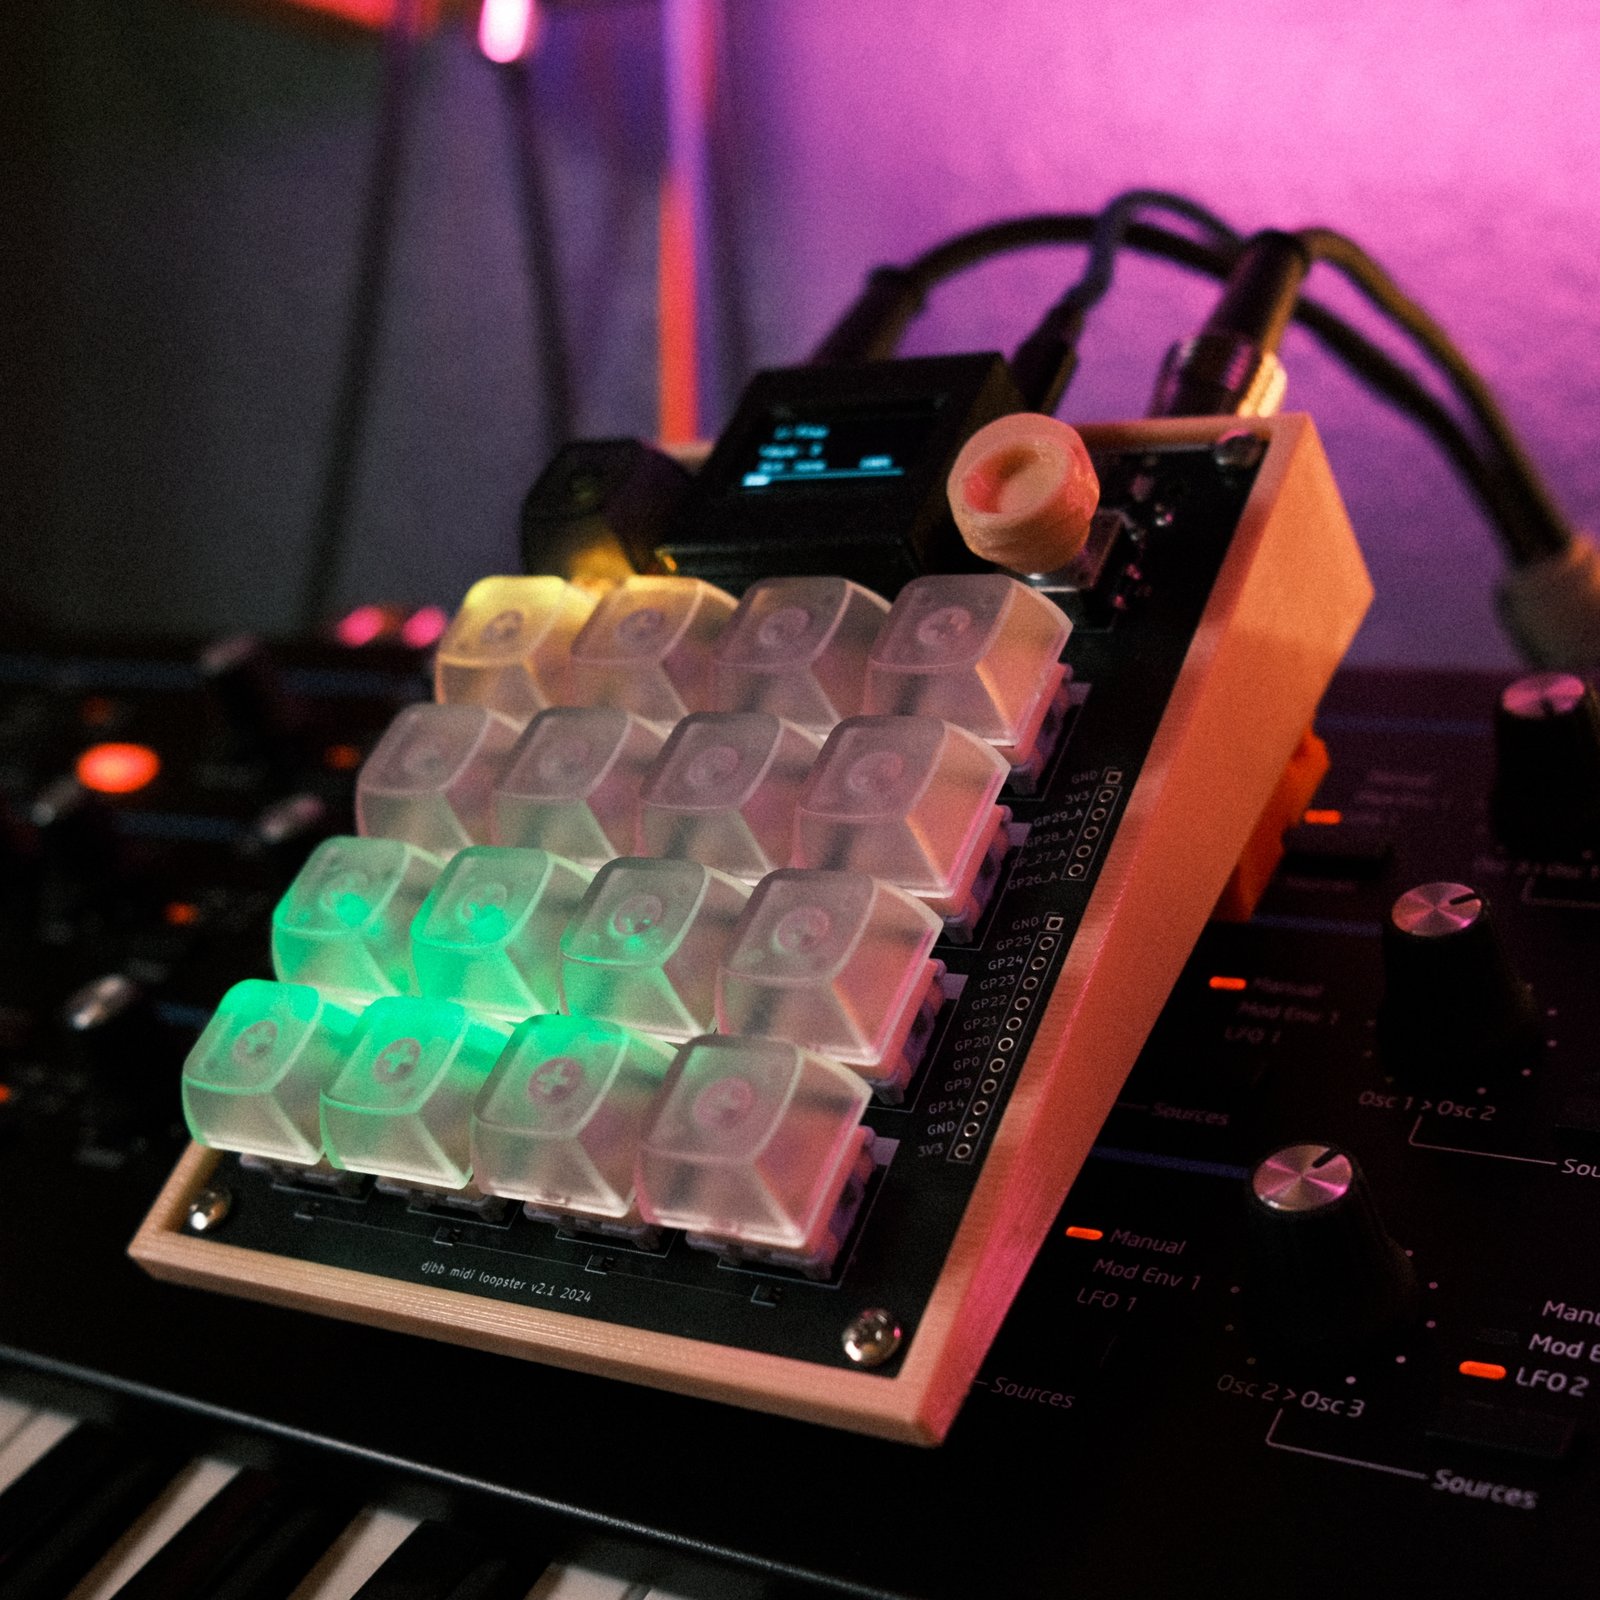
- RGB LEDs for buttons for user feedback
- Full sized MIDI In and MIDI Out in addition to USB midi
- Button matrix to use fewer GPIOs
- Unused GPIOs broken out to headers
- Add your own sliders / buttons
- Control a strip of neopixels
- Audio out via PWM
- Slanted case design
New Features:
- Arpeggiator – hold buttons and turn encoder
- Save / Load user presets
- save scale, starting screen, arp settings, MIDI channel, etc.
- Quantize chords and loops
- MIDI In Sync
- BPM
- Start / stop messages
- Record MIDI In to loops / chords
- RGB LEDs for user feedback
- Recording pad blinks red, etc.
The problems I aimed to solve with V2 were mainly:
Make it easier to produce: I sold 5 units and a handful of kits of V1 and realized that it took me too long to assemble everything. I intend to sell this one as well, and want it to be fairly inexpensive.
Better MIDI features: TRS MIDI is annoying and we all know it. I wanted to be able to plug this directly into a synth without worrying about grabbing the right converter cable (or buying a new one)
Figure Out MIDI In: could have done this with USB MIDI in the last version, but that didn’t sound as useful as DIN MIDI In. I wanted to plug a MIDI keyboard into the Loopster and use it to record some loops and chords.
Better User Interface: I could only do so much with the little screen, and on top of that, it was CPU intensive to update.
Design Process
I don’t feel like going into detail about everything, and you can find better tutorials elsewhere anyway. I’ll focus on specific things that I learned.
Schematic / PCB Design
I don’t have a ton of experience with PCB layout and design – pretty much just the projects you see on this website that involve it. I was nervous about stepping it up so hard by embedding the raspberry pi Pico circuit directly into the board, so I settled on designing just a clone of the RP2040 for practice. But then I thought nah, let’s do it live.
The Raspberry Pi Hardware Design document was super thorough and easy to follow. It uses very common components, all of which JLCPCB had in stock. I had never done anything this close to this complicated and it worked after just a few modifications which have since been fixed on the PCB – keeping track of MIDI pins is hard :/. Either the lesson is that I experienced a miracle, or that you shouldn’t be afraid to try the same, even if you are a beginner like me.
BUTTONS
My main criteria were:
- Satisfying to push (not mushy)
- Relatively quiet (no arcade buttons)
I settled on cherry-style keyswitches that are fairly linear (aka not the super clicky “blue” ones.
DIN MIDI
A lot of folks don’t use USB midi. The old design used mini TRS for a midi out solution, but had no midi in. I knew I wanted to use full sized DIN midi ports, in and out. I have never messed with midi in, but it wasn’t too difficult to figure out. This website is super helpful
I messed up the pins on the first try – it’s super easy to confuse the orientation. Thankfully it wasn’t a critical mistake and using little jumpers helped to fix it. this cheat sheet is the best.
SCREEN / NEOPIXELS
I wanted to add features to the loopster, but needed a better solution for a user interface. Doing more with the SSD1306 OLED screen was a non-starter, as it’s too slow to update can’t have 200ms pauses when sendn MIDI notes. I landed on Neopixels under each key, the select button, and the encoder. Neopixels are great because they only take up one GPIO pin, regardless of length. They are also dirt cheap and there are libraries for using them for everything at this point. I could use multiple colors to emphasize to the user what is going on (button flashing red = recording, etc.).
The neopixels seem to run fine on 3.3 volts – I have always done this without a problem so I wasn’t worried too much.
Hardware lessons
- Be careful about DIN MIDI Pinouts – whether you are looking at the male or female view matters
- Break out unused pins to a header on the side, cause why not
- Always use the “dumbest” pin possible when assigning inputs / peripherals to pins.
- Try not to use a SPI pin if another digital pin with no special features is available
- Don’t use analog pins for digital things unless you have to
- Put white silkscreen under LEDs to bounce light up
Software Lessons
- When using Python… use more classes. Even if it seems kinda dumb at the time.
- Use GitHub more. Adding enhancement requests / issues to my own repo was super helpful for documenting and tracking.
- Use a “globals” file or some file that can be imported everywhere to avoid dealing with circular dependencies.
- Resist the urge to optimize – I made bad design choices to save on performance, but who knows if it even would have mattered. Better to ignore until it’s a problem.
- Keep modularization in mind the whole time. I refactored like 3 separate times because things would get unmanageable due to me not considering that some things would need to be used elsewhere in the future.
- AI is kinda nice. I resisted using it for whatever reason, but it does a great job with writing small Python functions and documenting code. Things that you know how to do, but are not interesting and take more time than you’d like.
- The last 10% takes as long as the first 90%. I swear I was almost done months ago… but kept finding small bugs and edge cases, and things that weren’t behaving as I wanted.