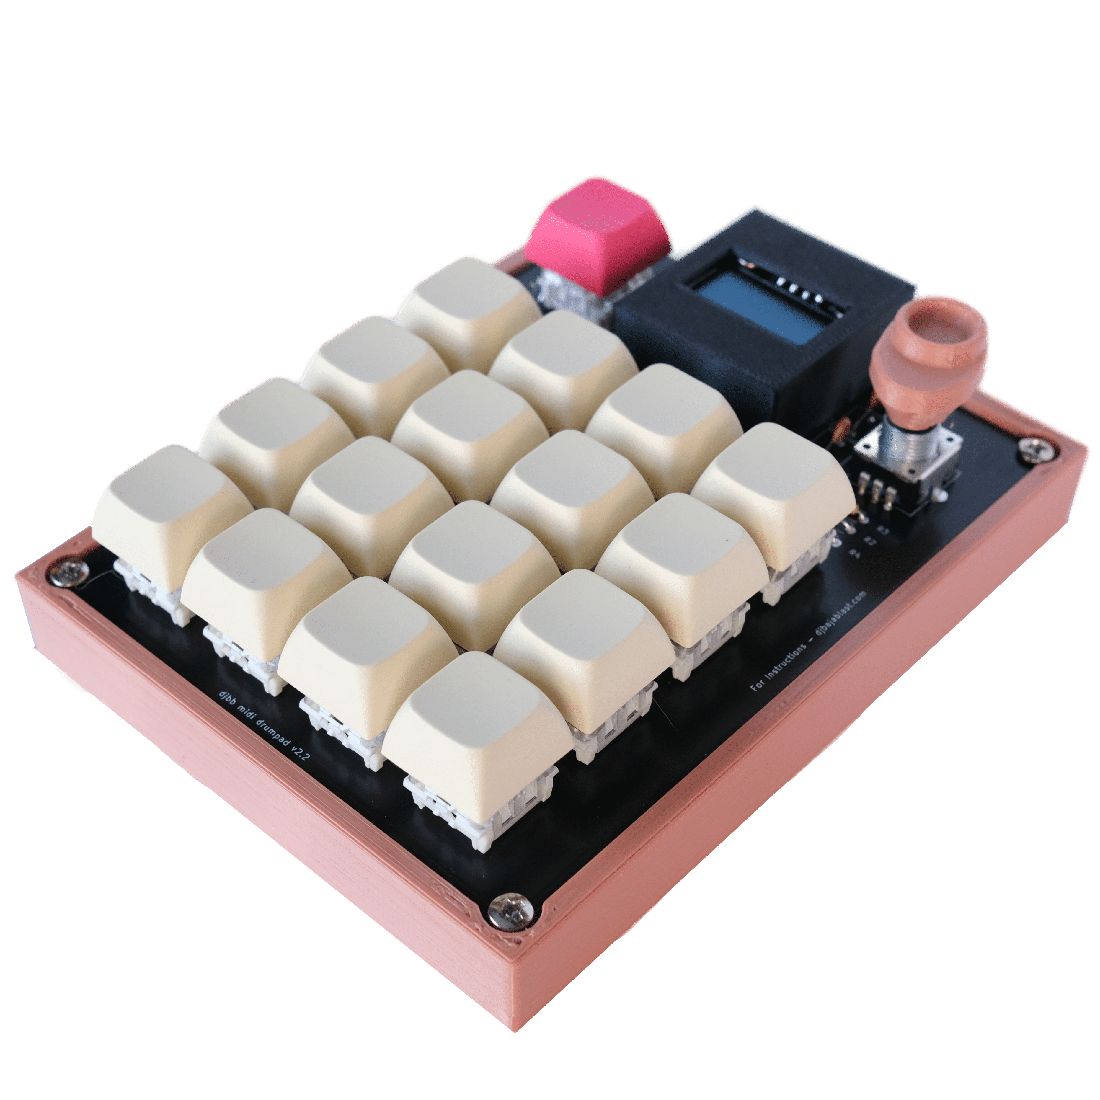
If you want to stay up to date on when I start selling kits of this, and other things related to this project, sign up for the mailing list here
Background
I created the DJBB Arcade Button MIDI Drumpad as an experiment on how to use a Raspberry Pi Pico microcontroller as a Midi controller.
It worked pretty well but I honestly don’t like the super loud arcade buttons so I never really used it. I wanted an excuse to try designing my first PCB, so I decided to go for a version two of my original design except with these changes:
- Use Cherry style key switches for the buttons (quieter but still feel nice. Also smaller)
- Uses a custom PCB for max compactness and ease of build
- Switch out controls for a function button and encoder
- Software updates and optimization
Features
- 16 Cherry MX style key switches for the pads, with one additional for the function button
- A nice encoder with a button for navigation
- Change midi banks
- Set velocity for each pad via encoder
- encoder mode – experimental way to send notes by twisting encoder
- looper mode – simple but fun and easy to use midi looper with overdub.
- Scale Select – filter down to midi notes in a scale
Demo
Components
1 x DJBB Midi Loopster PCB
1 x Raspberry Pi Pico or Pico W With Headers**djt depends on wifi stuff
1 x SSD1306 OLED Screen
5 x 10k Resistors
1 x 10 Ohm Resistor
1 x 33 Ohm Resistor
17 x Cherry MX Style key switches
1 x Rotary Encoder
1 x 3.5mm Audio Jack
3 x 10nF Capacitors
1 x 3D printed case (optional)
1 x 3D printed screen case (optional)
1 x 4 pin female large headers for screen (optional)
17 x Cherry style key switches (technically optional… but you want em)
BOM in csv format can be found in this GitHub repo (along with the code for this project)
The PCB
Designing my first circuit in KiCad was surprisingly easy. This DigiKey tutorial series was extremely helpful.
Here is the schematic
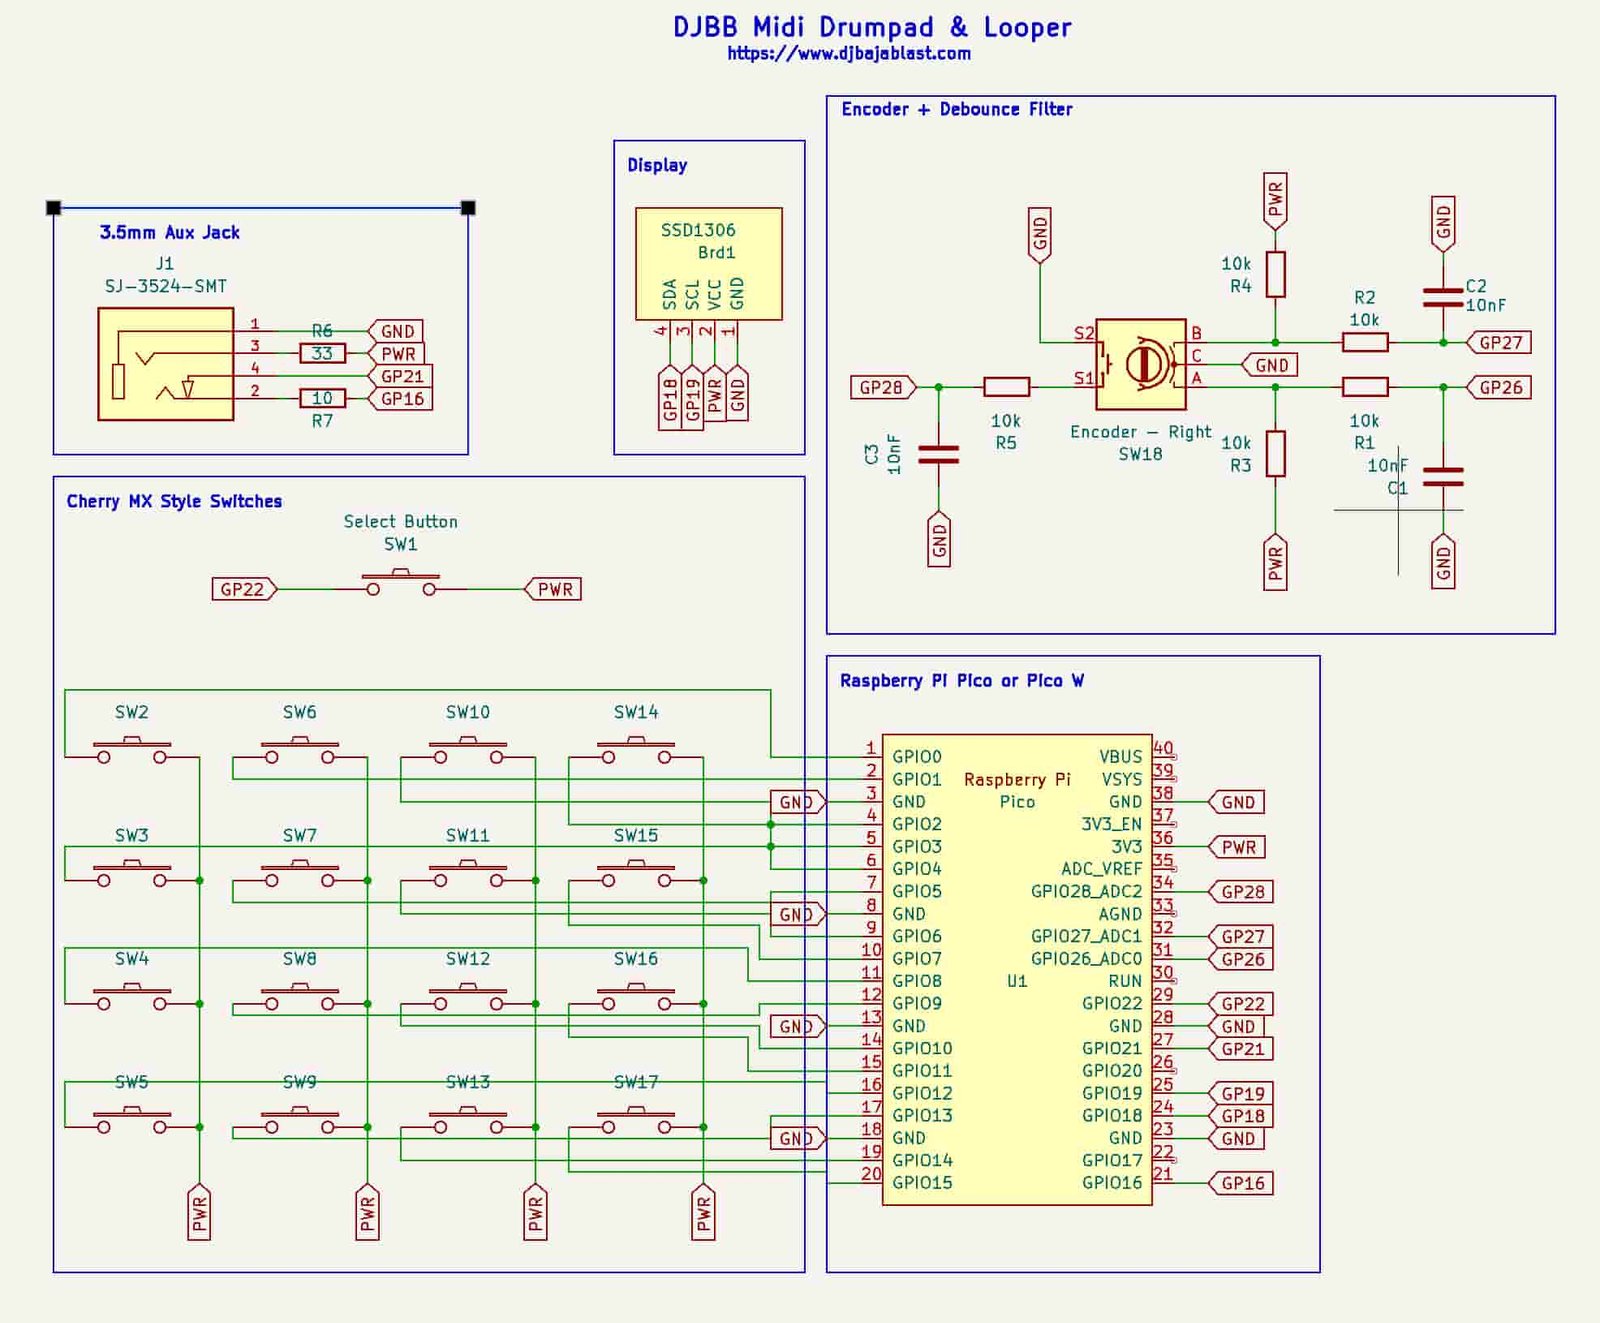
Device Schematic
Here is the Layout
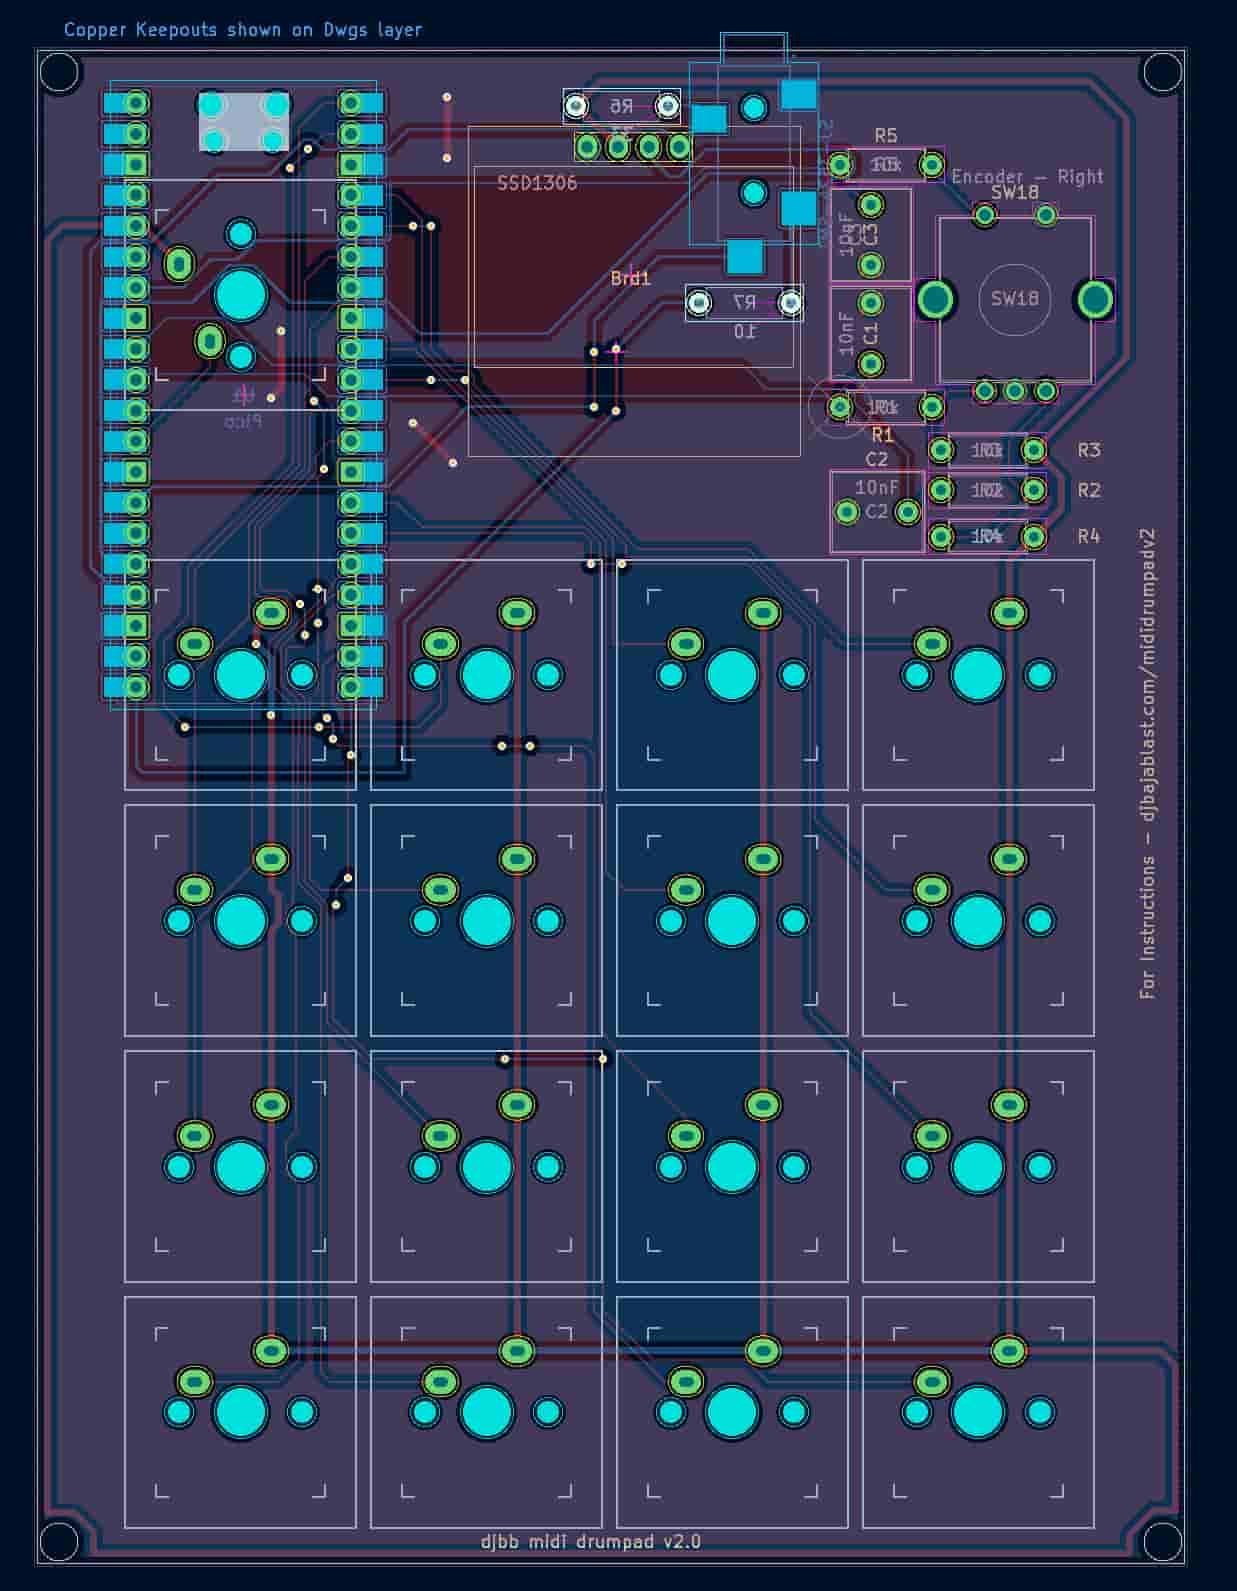
PCB Layout of DJBB Midi Drumpad
Assembly
PCBs came in looking good. Time to assemble.
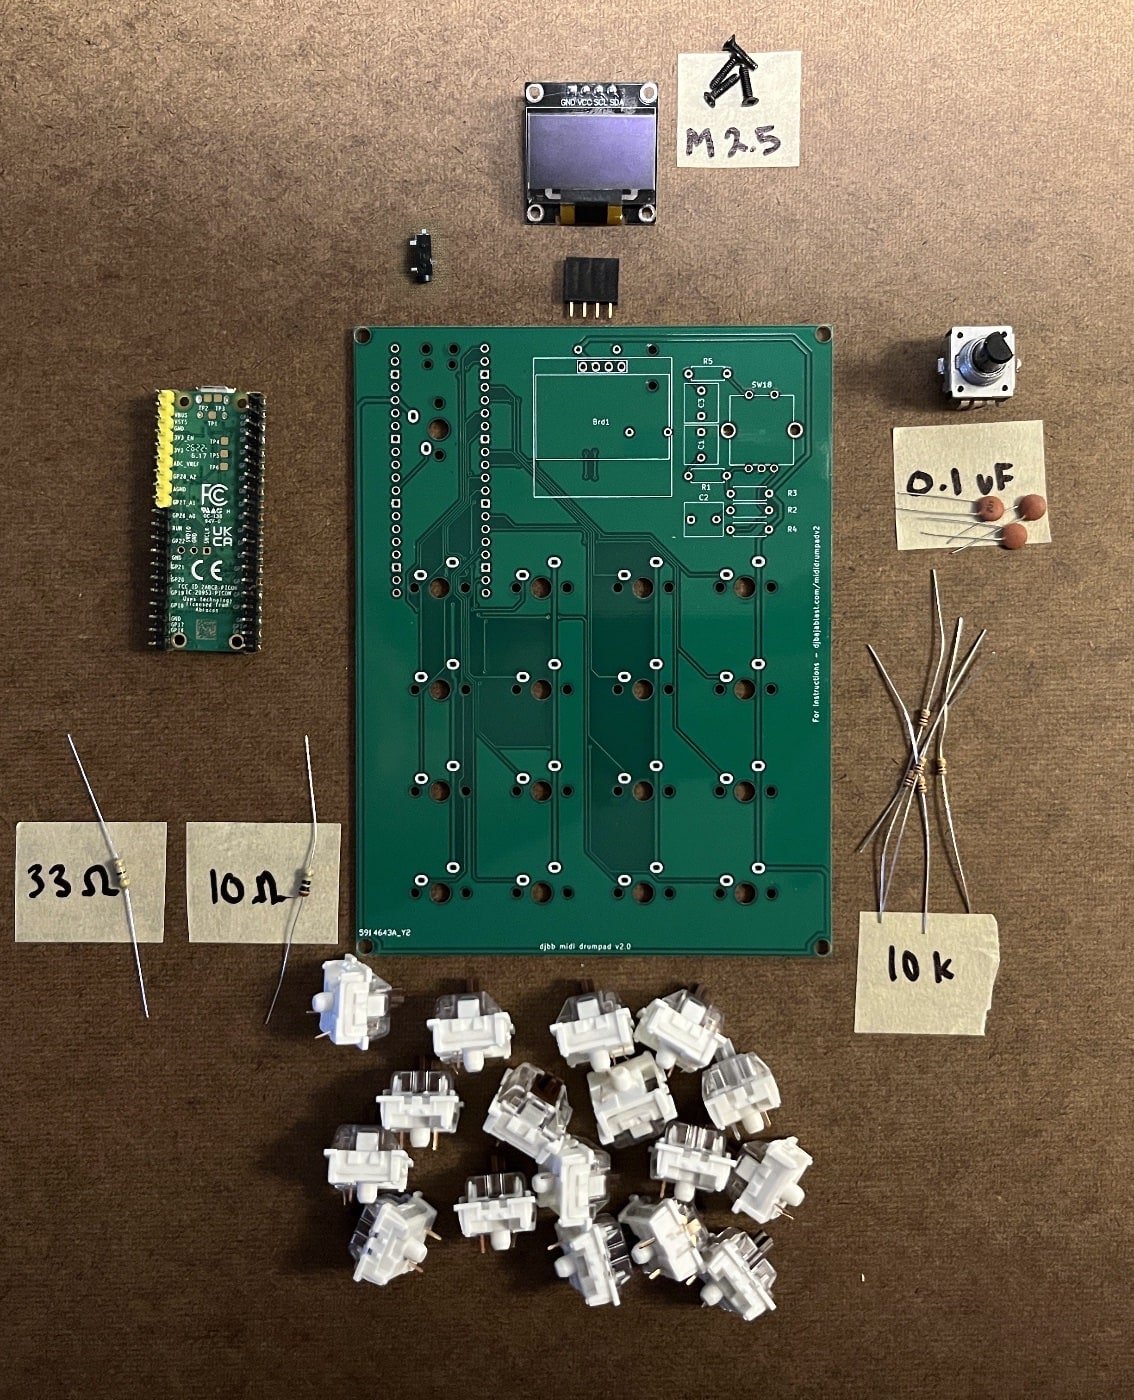
all required parts and the PCB
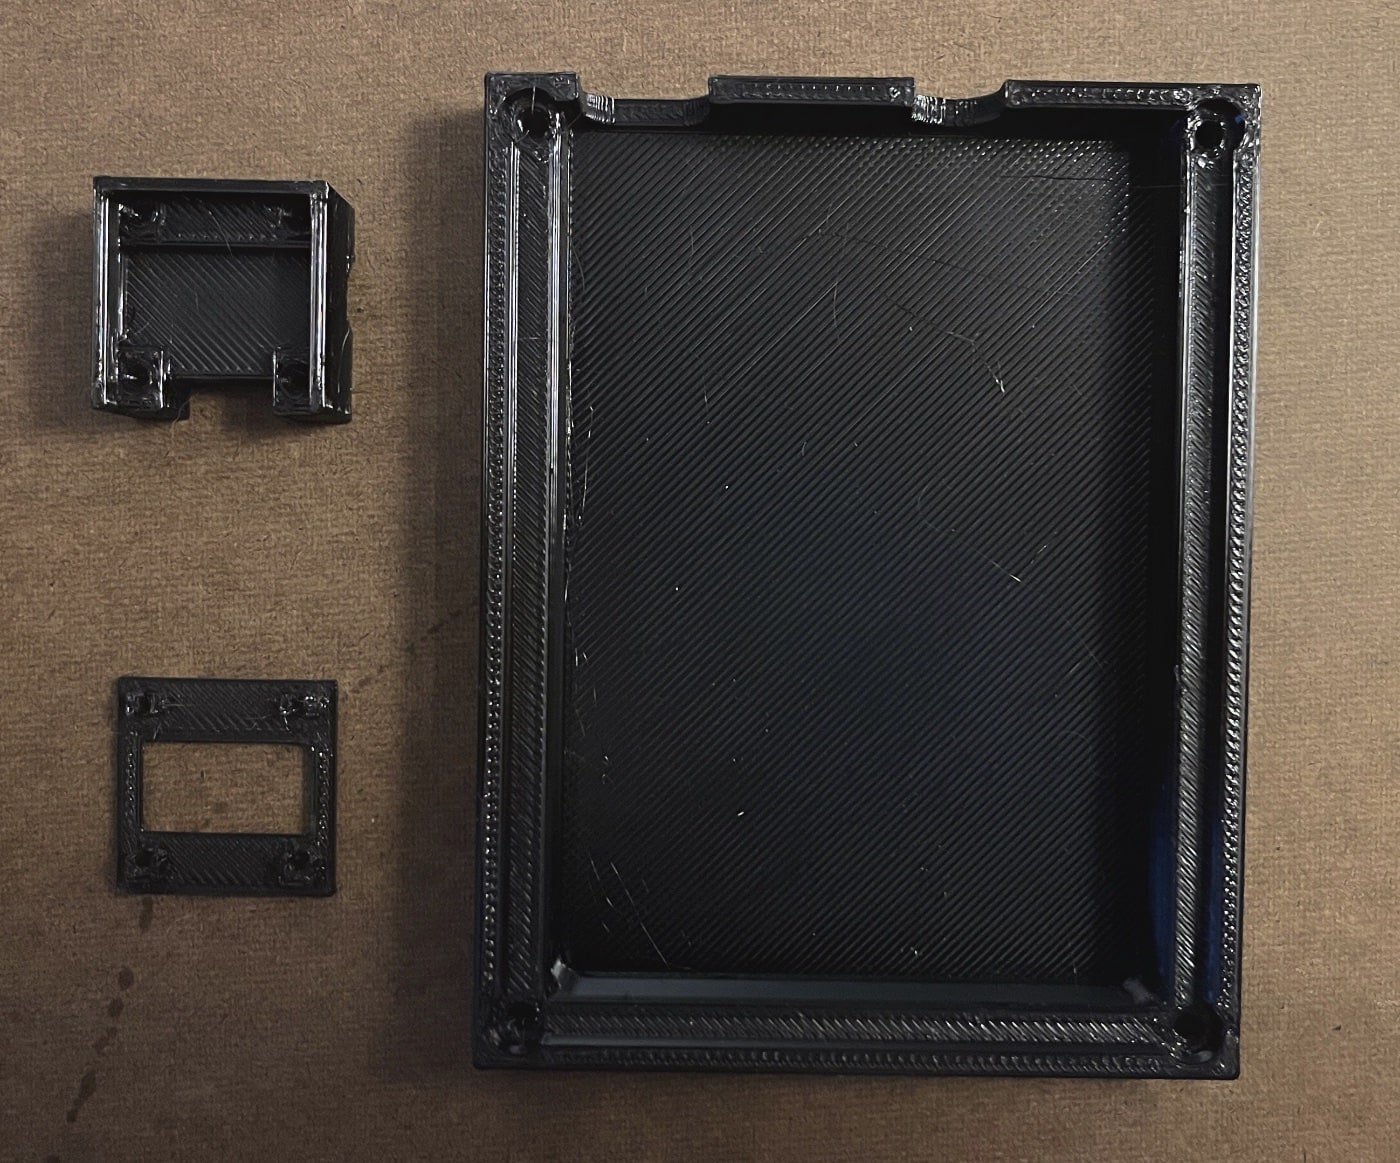
all optional but recommended parts. 3D printed screen case, and overall case.
!! IMPORTANT – MAKE SURE TO DO THIS FIRST !!
First, solder in the two key switches opposite of the Pico on the PCB (the Function key and Pad 1 keys – upper left).
If you do this AFTER you solder in the Pico, you won’t be able to get to the contacts on the back of the board. I fried a Pico trying to jamming a soldering iron up in there to try to solder in the switches…
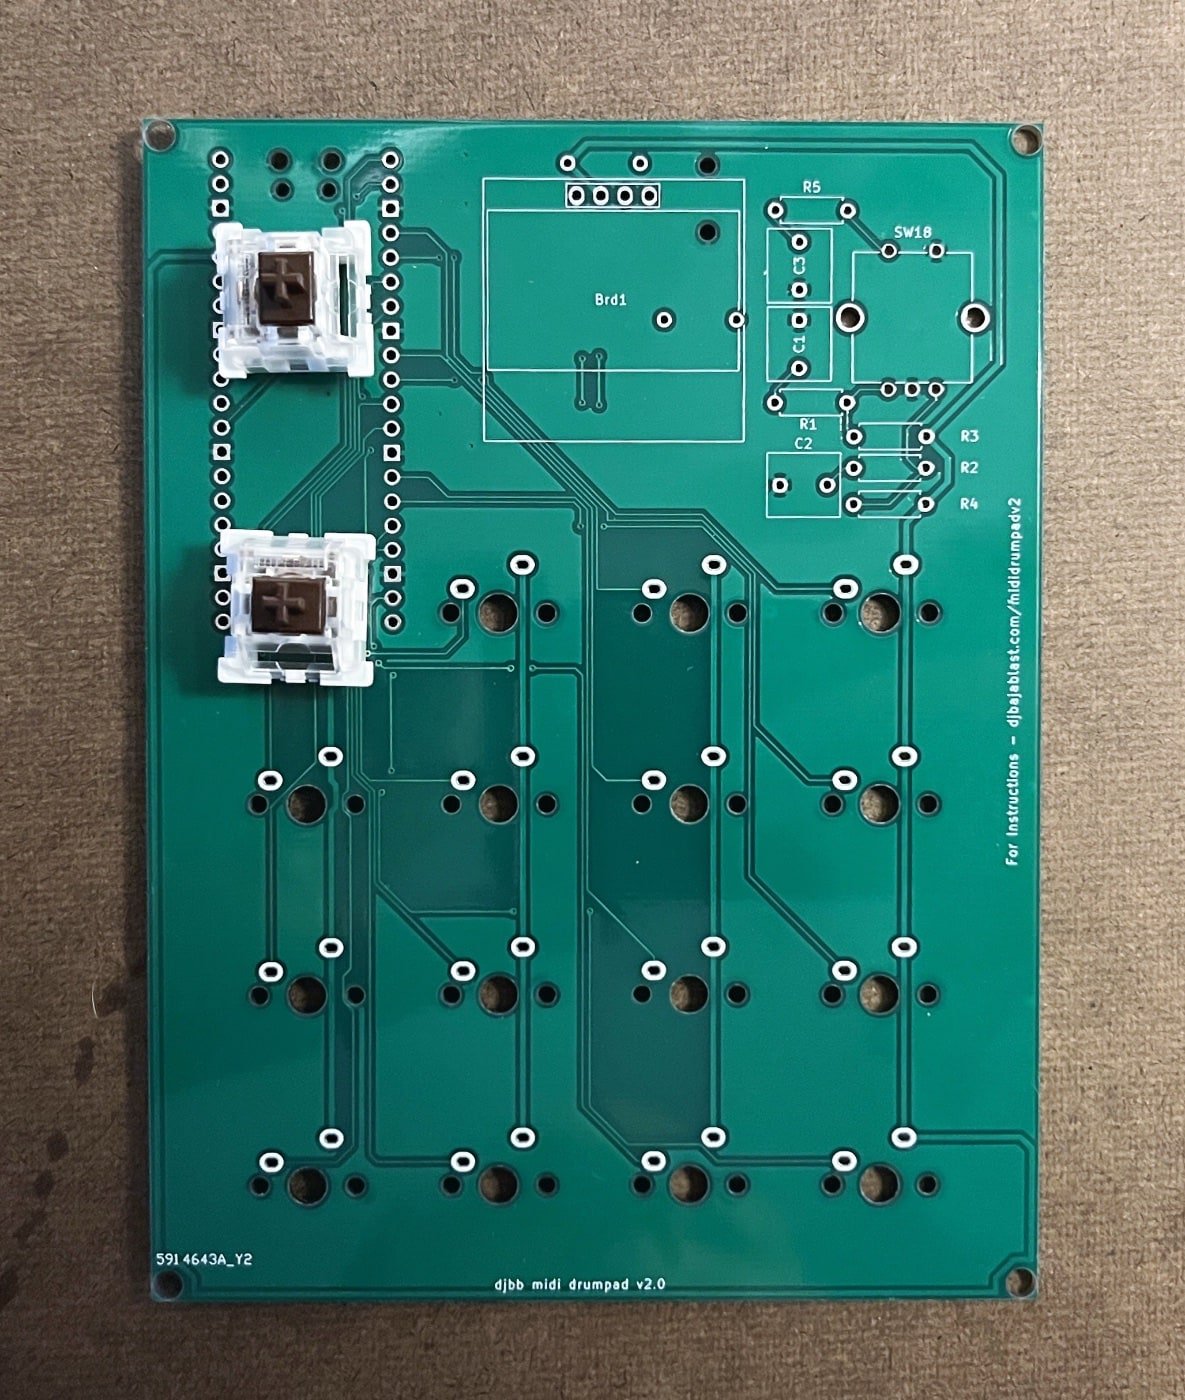
PCB with 2 switches soldered in on the top left portion of the board. DO THIS FIRST.
Solder in the resistors and capacitors.
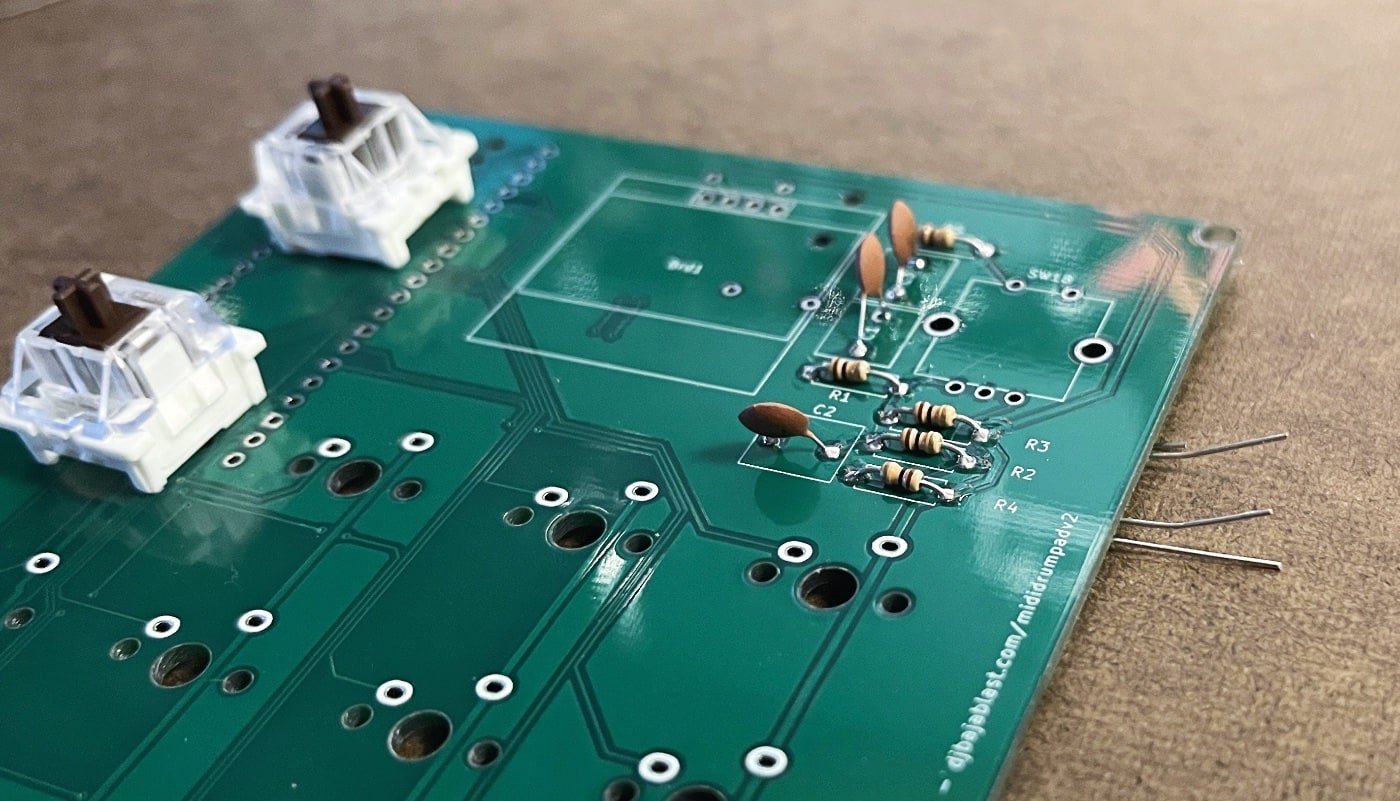
PCB with resistors and capacitors soldered to the front
Flip the board over and clip the excess leads.
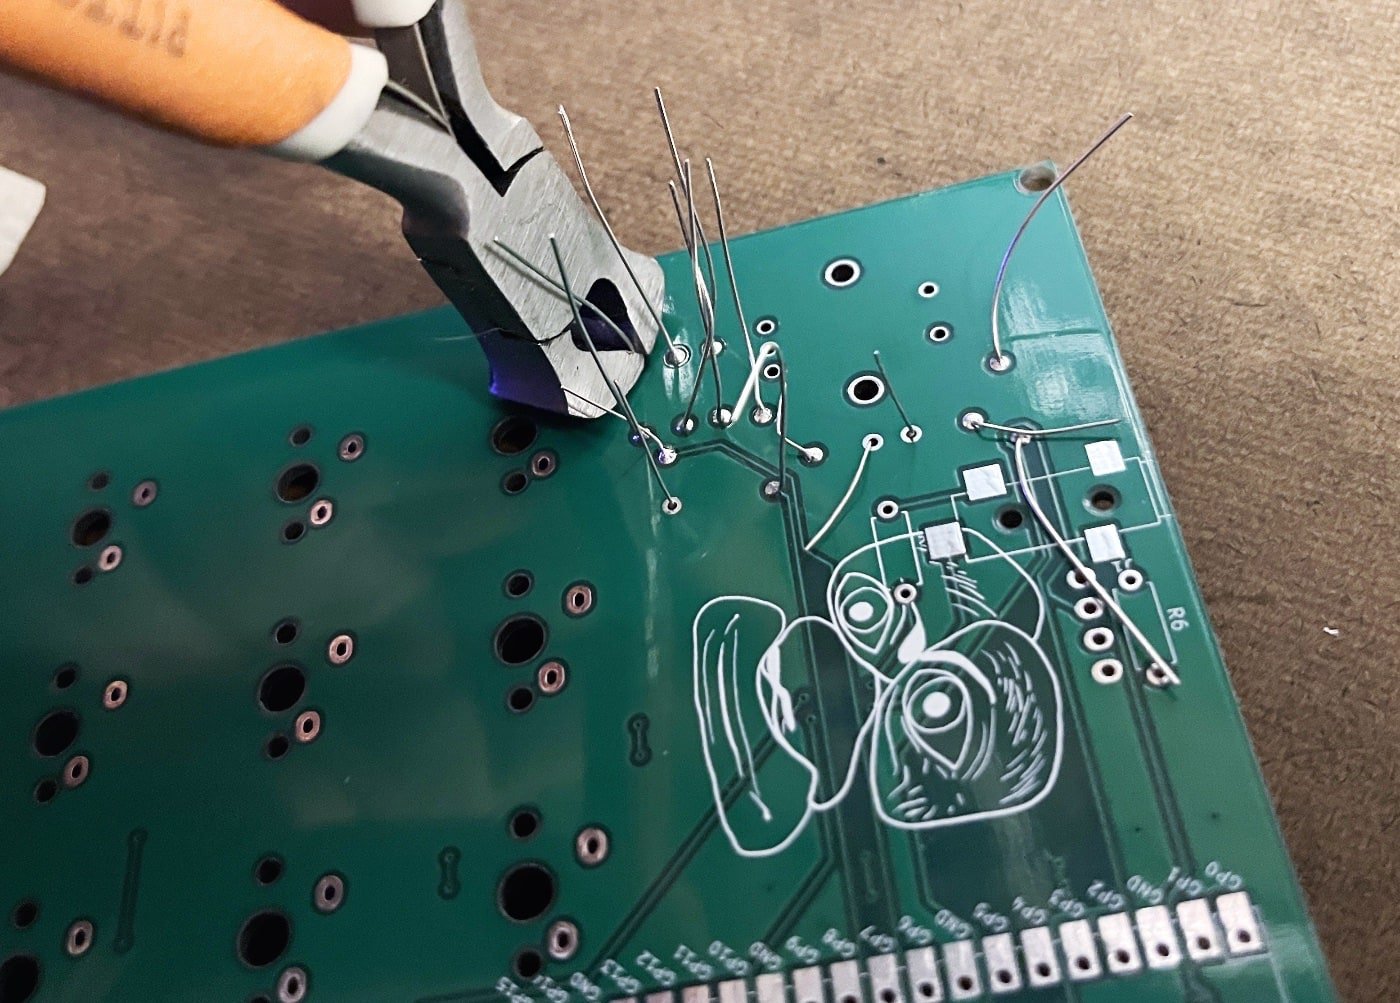
Clipping off extra leads on the back
If your Pico doesn’t have headers, solder those on now. Solder the 2 remaining resistors, the aux jack, and the Pico to the back of the board.
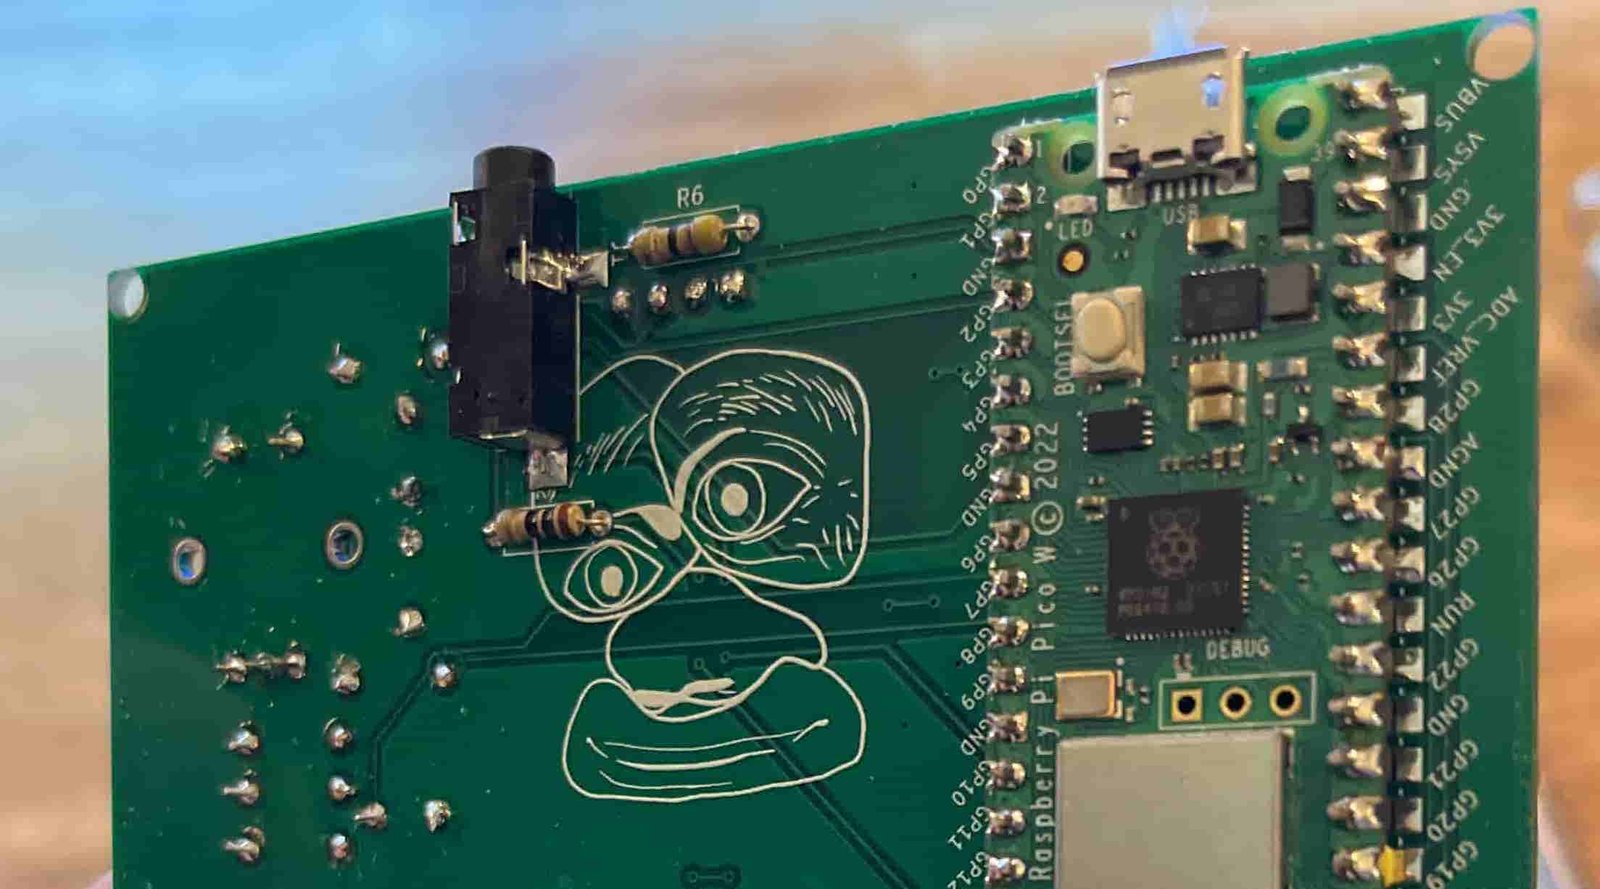
Back of PCB with resistors, aux jack, and pico soldered
Solder on the encoder – you may need to bend the two mounting tabs on the encoder if they don’t fit in the PCB holes.
Now solder on the switches. I found it helpful to just tape them in place, flip the board, and then solder them all in one shot.
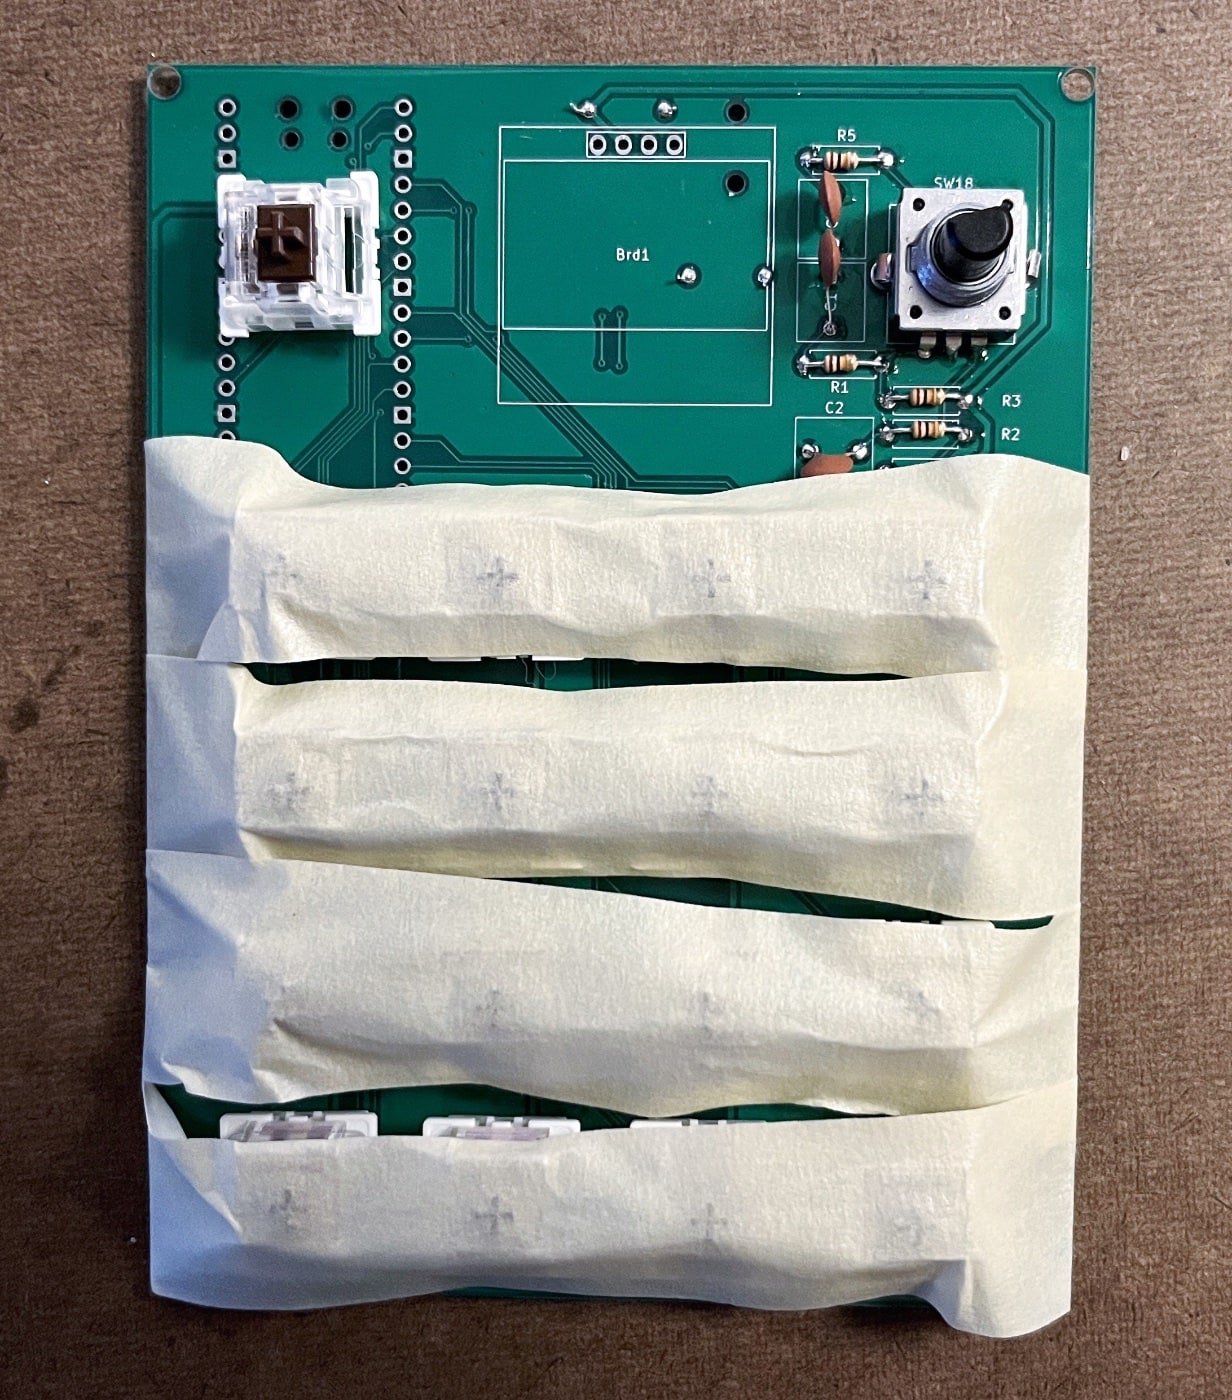
Board with buttons taped in to hold them in place
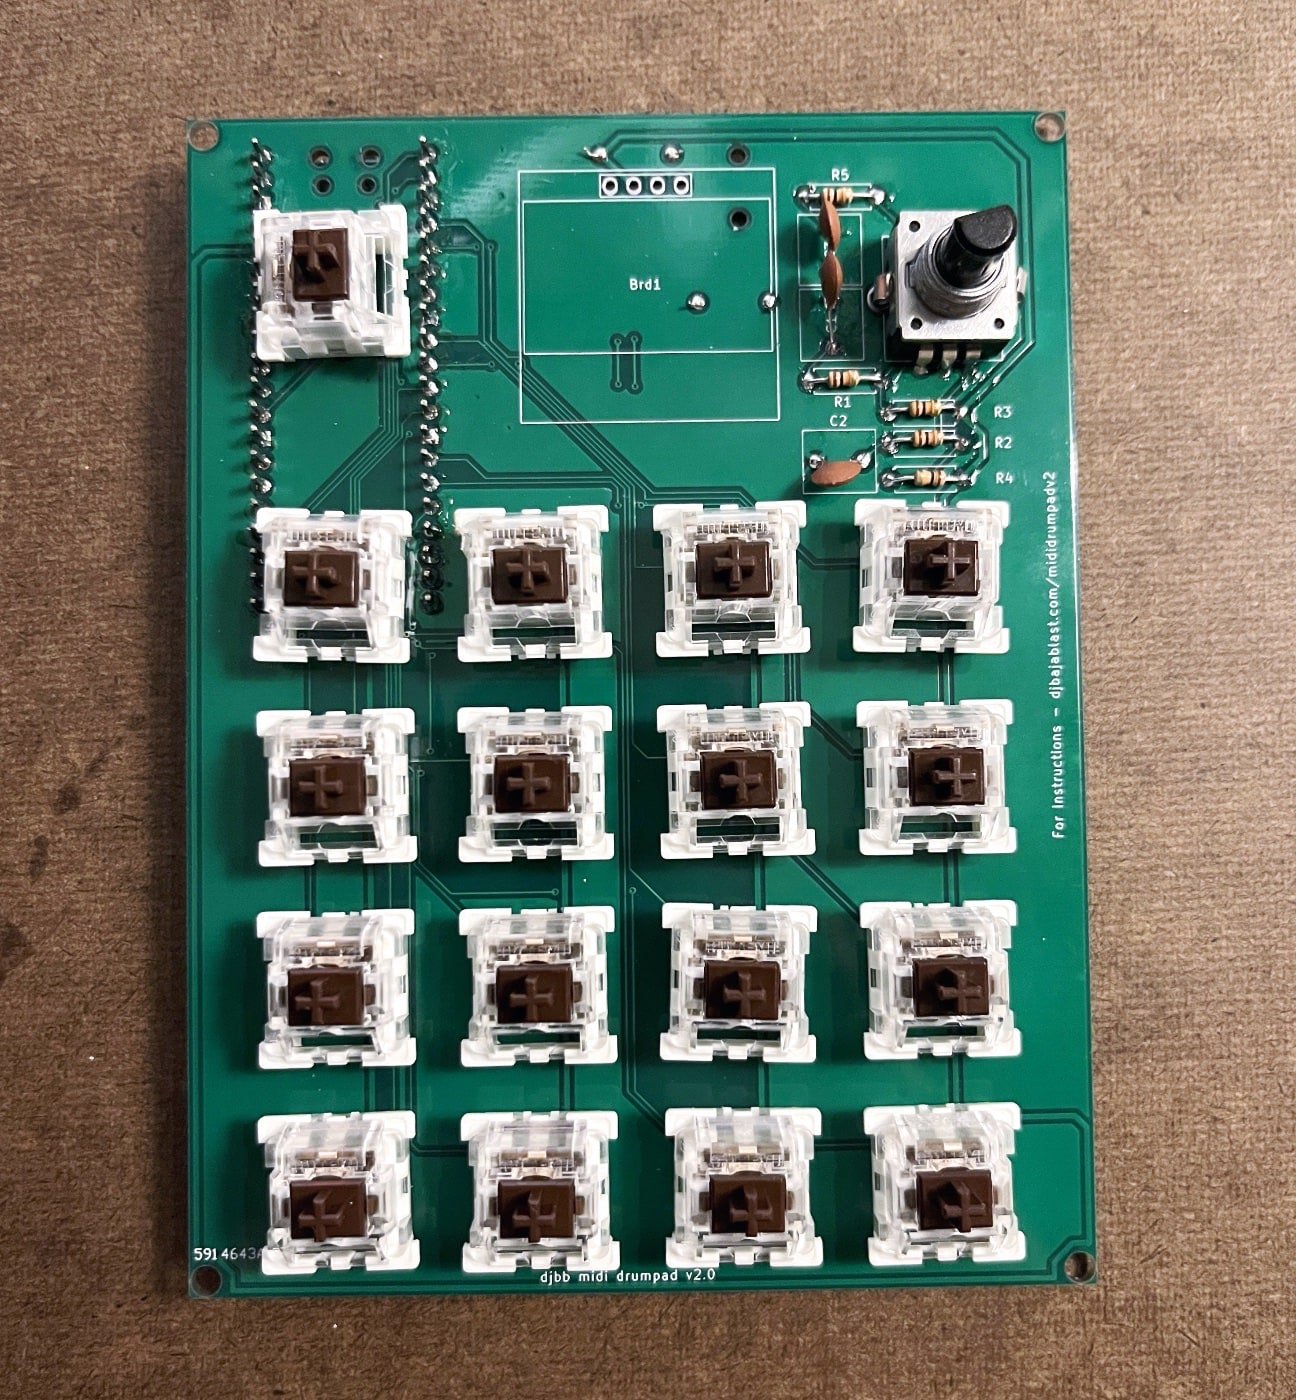
Board with all components soldered except for the screen
We saved the screen for last simply because it’s the most delicate part. Time to put it on. If you are using the 3D printed spacer / protection case, screw the screen and top on in with M2.5 screws.
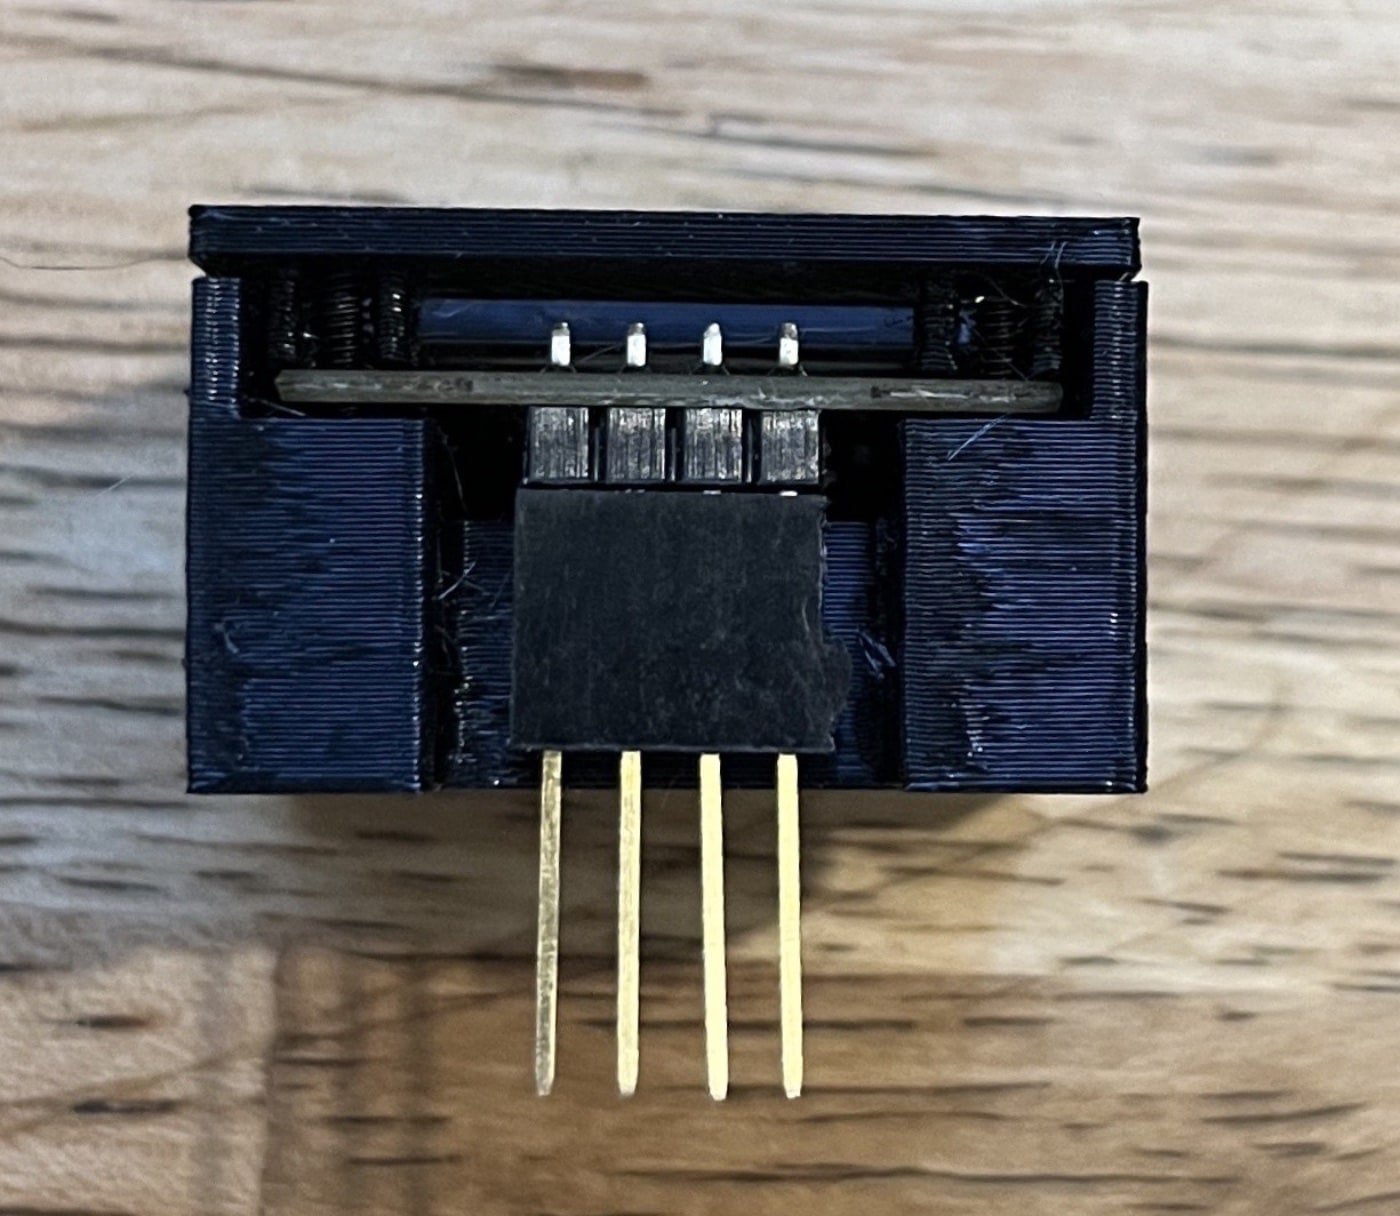
Back of screen in its case. The side you see here will be facing the top of the PCB. Note that the long headers attached here are not permanent – these represent the ones soldered into the board in the above step.
Solder in the large 4 pin female header for the screen. This is optional, but without it, once keycaps are added, the screen sits pretty far below the buttons.
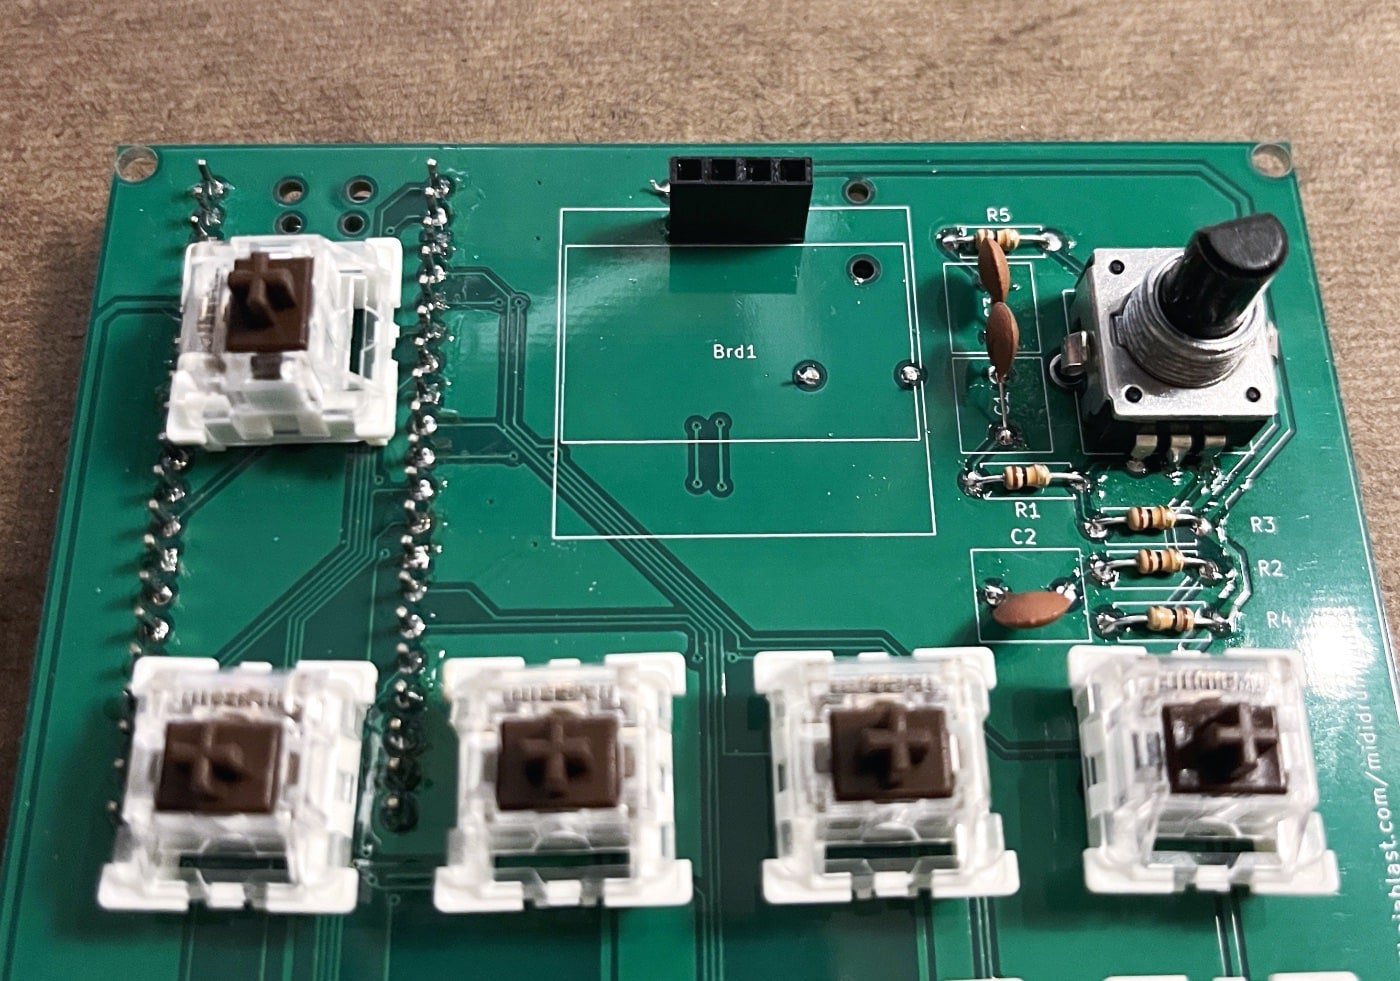
Front of board with screen headers soldered in
Here is the whole thing put together with the screen unit assembled. Once you confirm the screen works, put a few drops of CA glue (superglue) where the screen unit meets the PCB to lock it in place. If you ever need to replace the screen, you can simply unscrew the front of the screen unit, remove the screen, and insert a new one into the female headers we soldered to the board.
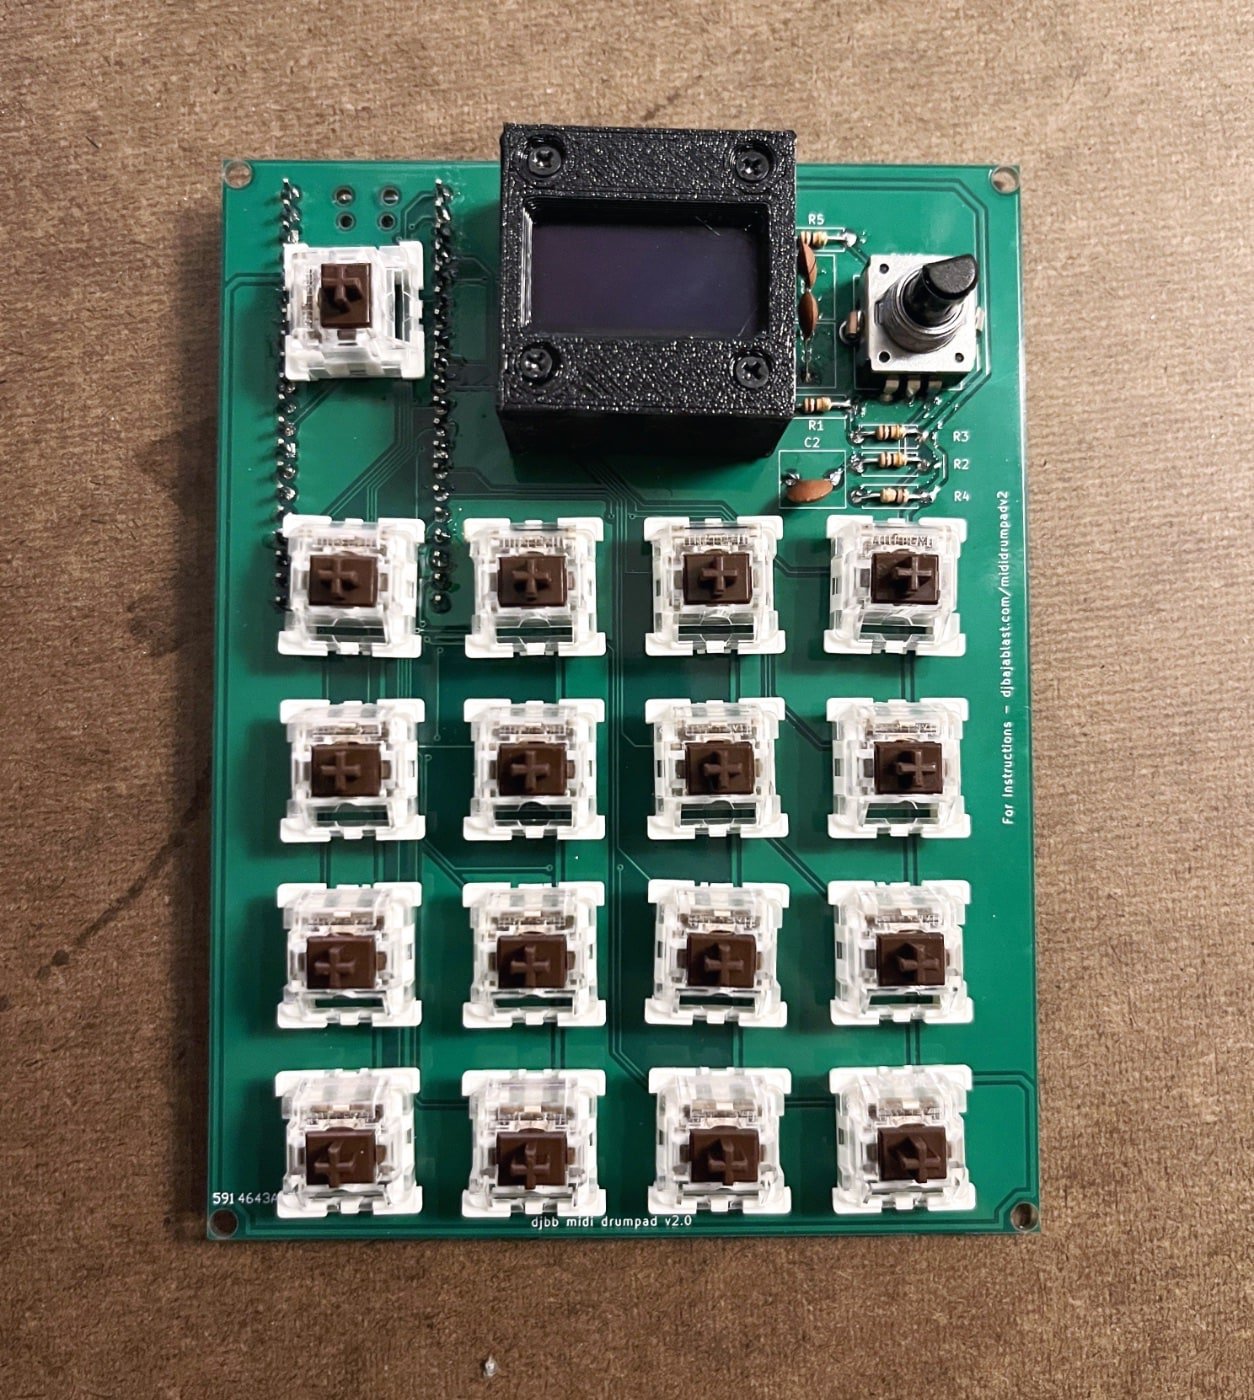
Complete DJBB Midi Loopster
Here is another view of a different unit. This one does not use the screen assembly setup.
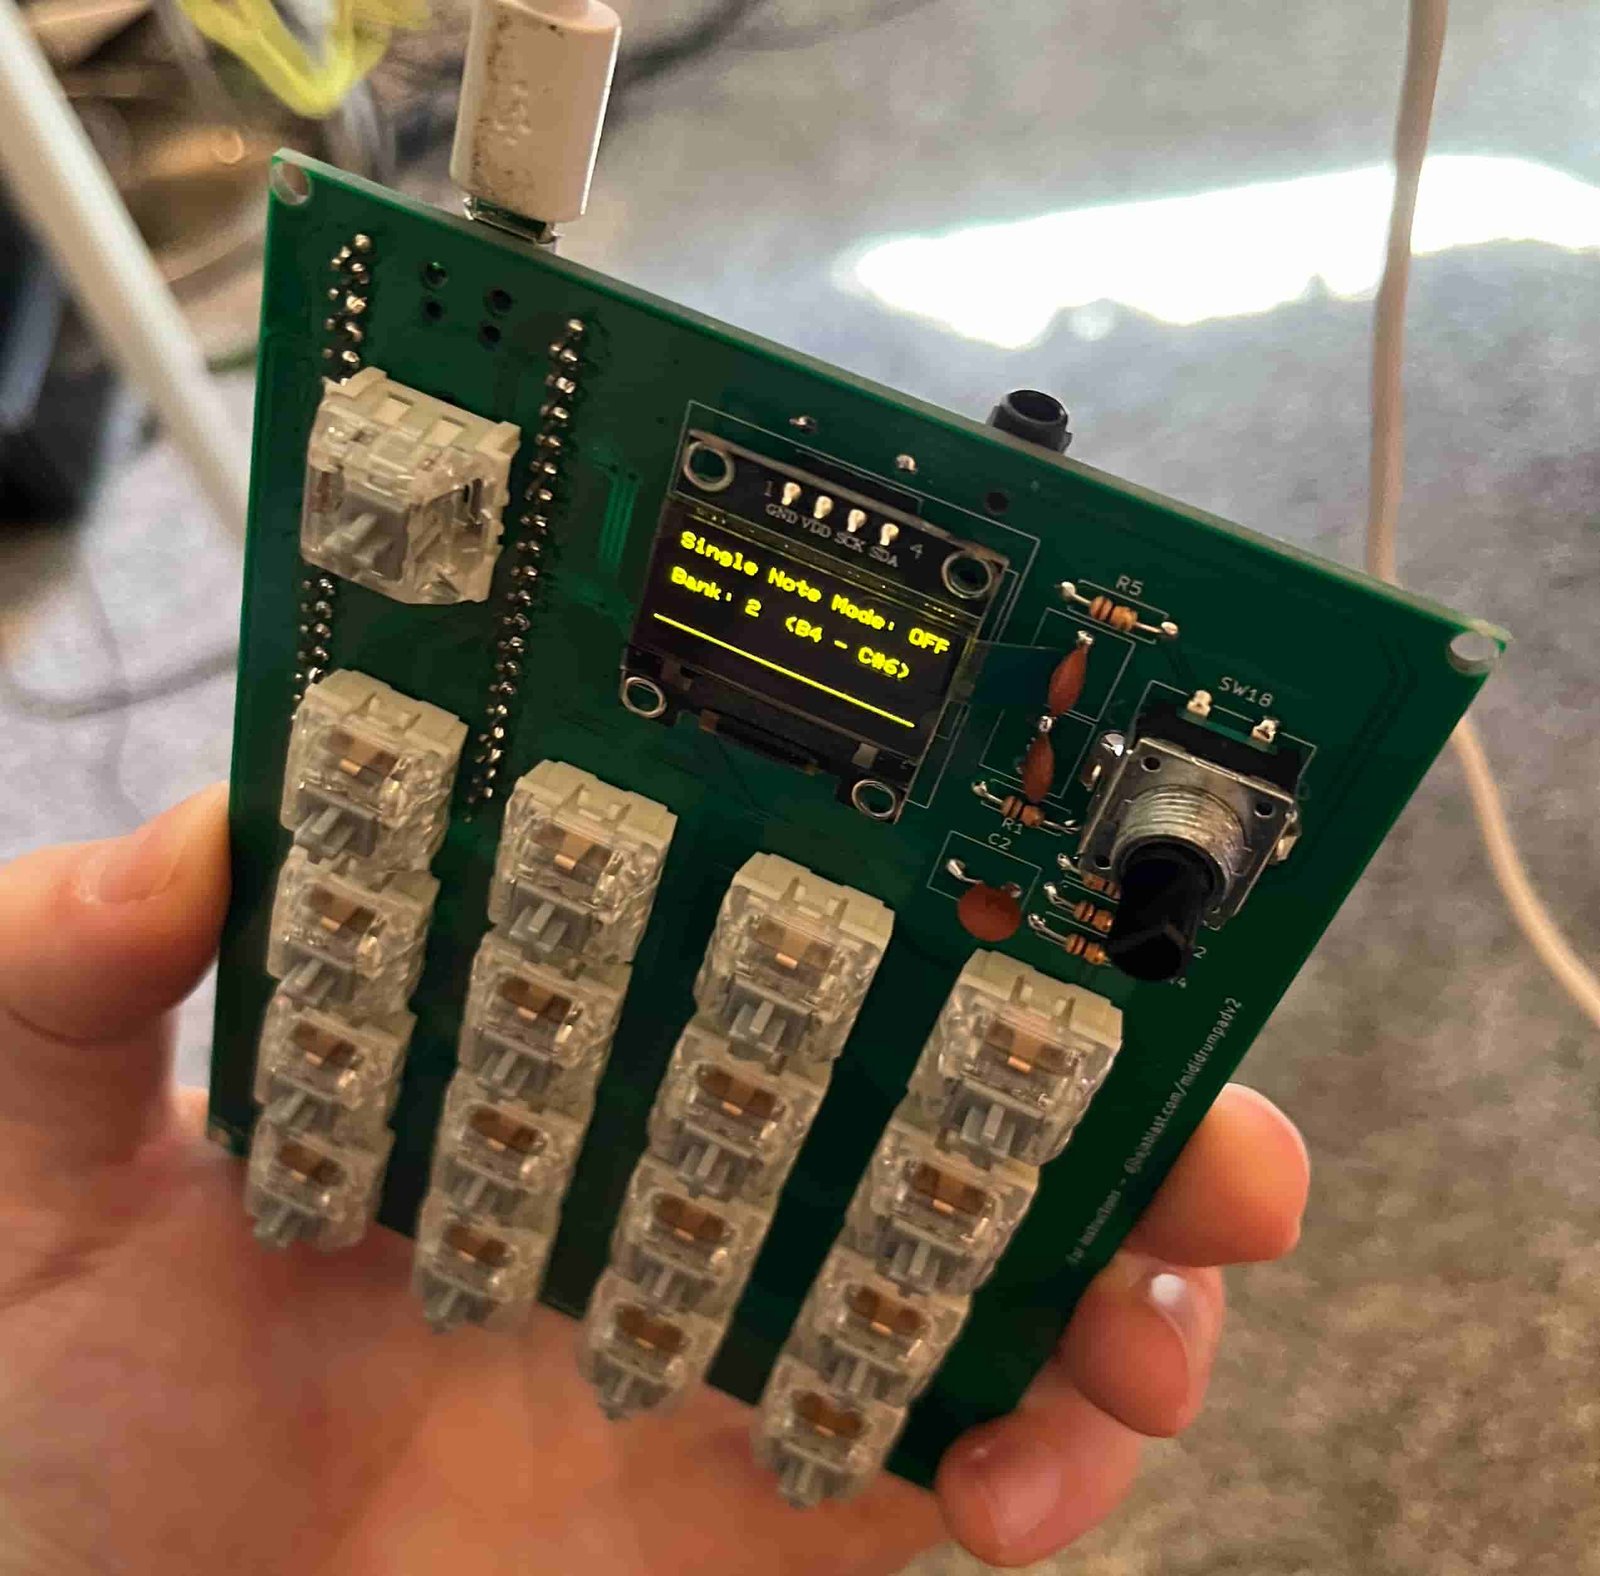
Complete PCB example with no screen case. Screen is soldered directly to the PCB.
Software
The software is written in CircuitPython – Adafruit’s version of MicroPython with some nice ease of use upgrades.
- Use this guide to configure your Pico
- Go to this GitHub Repo and download everything in the “src” folder.
- Drag the contents of the src folder to your Pico in Finder / Explorer (to the root directory)
- Unplug and then plug in the Pico. The screen should light up.
Troubleshooting
- If the Pico isn’t showing up on your computer, make sure your USB cable isn’t power only. if it isn’t, check your soldering.
Design Decisions
Use a screen.
I kinda didn’t want to because it adds to the cost and is kinda fragile. But I also didn’t want an awful user interface, which I think would happen without a screen (with the level of features I wanted, anyway). To combat the fragility problem, I designed a 3d printed spacer <**djt add link here > that solves a few other problems as well. It has a lip to protect the screen, lifts it off the PCB to get it more in line with the other higher components, and can accept a lid, for transport protection. I also designed the screen to be easily replaceable, just in case it cracks or something.
Use quality parts, where possible.
I basically got good components unless prohibitively expensive. The PCBs are from JLPCB, but honestly they look great and are literally 5x the price to get USA made :(.
The screen was another issue. I wanted to use the little SSD1206 screens from familiarity (and cause they use less pins on the pico), but the ones from Aliexpress are like 8x cheaper than the ones sold by Adafruit, etc. I couldn’t find any other suppliers (but please let me know if you know of one). The Adafruit ones looked to me like the same thing as the Chinese ones, with perhaps some quality control on Adafruit’s part. I decided to order a bunch from Aliexpress and do my own quality control. So far so good.
SO:
Good: encoder, key switches, resistors, capacitors
Eh: screen, PCB
Refresh the screen as little as possible.
I knew from my last go-around that the screen refreshing eats up a LOT of processing power on the Pico and makes the midi output laggy if done too much.
The downside is that I can’t do fun little animations or display real time information (what midi note was just played for example). It only updates part of the screen and only when an important setting change happens (changing the menu, etc.).
Use Cherry-style key switches.
Last time I used arcade buttons but they were loud as heck. These silver Kailua switches are quiet and feel nice, and are quite affordable. Could have skimped and used Aliexpress for these but I really wanted to like the buttons this time.
Change navigation from buttons to encoder.
The old version used little buttons which made menu navigation no fun. The encoder effectively has 3 inputs in one: left, right, or push.
Make a PCB.
I have always wanted to but it was intimidating. KiCad was thankfully very intuitive and I was surprised at how relatively easy it was to pick up.
Make it easy to modify
I wanted to make this open source, so I want it to be easy to interact with. I chose Circuitpython because:
- It has all the Midi and display libraries I need.
- It’s still fast enough for MIDI stuff (as compared to C).
- It’s easy to get to the code on and off the Pico.
Enhancement Ideas
Change Log
Nov 2023
- Created loopster_settings.json file for easy default config
- Added performance mode congig option
- Added looper feature – twist encoder ccw to remove a random loop note
- Added more scales
![DJBB – Unclear! [M P C D-LITE]]](https://djbajablast.com/wp-content/uploads/2026/06/b579cc0e40d9.jpg)